Planning a memorable birthday celebration doesn’t require very costly or spending hours on elaborate setups. We’ve discovered that the most heartfelt parties often come from simple, creative touches that transform your home into a festive wonderland without overwhelming your budget or schedule.
Whether you’re celebrating a child’s milestone or an adult’s special day, we believe that thoughtful decorations create lasting memories. Simple doesn’t mean boring – it means focusing on impactful elements that deliver maximum joy with minimal effort. From balloon arrangements to DIY banners, small touches can completely transform your living space.
We’ll show you how everyday household items can become stunning party decorations and share time-tested ideas that work for any age or theme. These simple birthday decoration strategies will help you create an Instagram-worthy celebration that feels personal and special, proving that the best parties come from the heart, not the wallet.
Create a Stunning Balloon Backdrop Wall
Transform any plain wall into a breathtaking focal point with our balloon backdrop technique. This cost-effective decoration method instantly elevates your home birthday celebration while requiring minimal setup time.
Choose Color-Coordinated Balloon Clusters
Select 3-4 complementary colors that match your birthday theme for maximum visual impact. Group balloons in clusters of 5-7 pieces, mixing different sizes from 9-inch to 12-inch latex balloons for dimensional texture. Arrange darker shades as your base layer with lighter tones in front to create natural depth. Bundle each cluster tightly with fishing line or clear balloon ribbon, leaving 6-inch tails for easy attachment. Plan approximately 40-50 balloons total for an 8-foot wide backdrop wall that’ll photograph beautifully.
Use Command Strips for Easy Wall Attachment
Mount heavy-duty Command strips every 18 inches along your wall at varying heights between 3-7 feet from the floor. Press each strip firmly for 30 seconds to ensure maximum adhesion strength before hanging your balloon clusters. Attach balloon cluster ribbons directly to the Command strip hooks, allowing clusters to hang at different lengths for organic movement. Remove strips carefully after the party by pulling tabs straight down to avoid wall damage. This method works perfectly on painted walls, wallpaper, and even textured surfaces without leaving residue.
Add Metallic Balloons for Extra Sparkle
Incorporate gold, silver, or rose gold foil balloons throughout your clusters to catch and reflect room lighting. Position metallic balloons strategically as accent pieces rather than filling entire clusters for balanced sparkle. Mix 1-2 metallic balloons per cluster with your coordinated latex balloons to maintain color harmony while adding glamour. Choose star or heart-shaped metallic options for birthday themes, or stick with classic round foil balloons for elegant sophistication. These reflective surfaces create stunning photo opportunities and make your backdrop appear more expensive than it actually cost.
Design DIY Paper Flower Decorations

Paper flowers transform any space into a vibrant celebration zone without breaking your budget. These handmade decorations add texture and dimension that store-bought items simply can’t match.
Cut Simple Tissue Paper Blooms
Tissue paper creates the most stunning blooms with just a few basic supplies. Start by gathering tissue paper in your chosen colors, sharp scissors, and strong thread for assembly.
Materials you’ll need:
- Tissue paper sheets (6-8 layers work best)
- Scissors
- Thread or thin wire
- Ruler for consistent sizing
Stack 6 to 8 sheets of tissue paper together and fold them accordion style with 1-inch pleats. Cut the ends into rounded or pointed shapes depending on your preferred petal style. Tie the center tightly with thread, then carefully separate each layer by pulling them upward and outward. These fluffy blooms work perfectly when hung from the ceiling at varying heights or clustered on walls for maximum visual impact.
Create Gradient Color Arrangements
Gradient arrangements bring sophisticated elegance to your birthday decorations through strategic color placement. Choose three to five colors that blend naturally together, such as pink to coral to orange or blue to purple to lavender.
Color combinations that work beautifully:
- Pastels: Light pink → Medium pink → Deep rose
- Ocean vibes: Light blue → Teal → Navy
- Sunset theme: Yellow → Orange → Red → Purple
Arrange your paper flowers from lightest to darkest across a wall or backdrop area. Start with the lightest shade on one end and gradually transition to the deepest color on the other side. This technique creates depth and draws the eye naturally across your decoration display.
Mount Flowers on Wooden Dowels
Wooden dowels transform paper flowers into versatile decoration pieces that can be repositioned throughout your party space. Purchase 1/4-inch dowels from any create store and cut them to varying lengths between 12 to 24 inches.
Assembly steps:
- Apply hot glue or create adhesive to one end of the dowel
- Press the flower base firmly onto the glue for 30 seconds
- Allow 5 minutes for complete adhesion before handling
These mounted flowers serve multiple purposes as centerpiece elements, photo booth props, or standalone decorative accents. Place them in tall vases filled with decorative stones or group them together in corners to create dimensional focal points that complement your balloon backdrop wall perfectly.
Set Up a Beautiful Birthday Banner Display

Creating a personalized birthday banner adds that perfect finishing touch to complement your balloon backdrop and paper flower arrangements.
Print Free Downloadable Letter Templates
We can easily access many free letter templates online to spell out “Happy Birthday” or the celebrant’s name. Downloading these templates saves both time and money compared to purchasing pre-made banners. Popular websites offer various font styles from playful bubble letters to elegant script designs. Printing the templates on our home printer allows us to customize colors and sizes to match our party theme perfectly.
String Together Colorful Cardstock Letters
Cardstock provides the durability we need for a professional-looking banner that won’t sag or tear. We should cut out each letter carefully using scissors or a create knife for clean edges. Punching small holes at the top corners of each letter creates easy threading points for our string or ribbon. Choosing coordinated colors that complement our balloon backdrop creates a cohesive party atmosphere throughout the space.
Hang at Eye Level for Maximum Impact
Positioning our banner at eye level ensures every guest notices this festive focal point immediately upon entering. We can measure approximately 5 to 6 feet from the floor for optimal viewing height. Securing the banner ends to walls using removable adhesive hooks prevents damage to our home’s surfaces. Stretching the banner taut eliminates drooping and maintains that crisp, professional appearance we want for our celebration photos.
Transform Your Space with String Light Magic

String lights offer an instant transformation that elevates any birthday celebration from ordinary to extraordinary. We’ll show you three versatile techniques that create stunning visual impact with minimal effort and cost.
Drape Warm White Lights Around Doorframes
Warm white lights around doorframes create an enchanting entrance that welcomes guests into your celebration space. Position the lights along the top and sides of doorways using small adhesive hooks or removable clips to avoid damage. Secure the cord at regular intervals to prevent sagging and ensure an even distribution of light.
Focus on main entryways and transitional spaces between rooms to guide guests naturally through your party area. Kitchen doorways work particularly well since they often serve as gathering spots during celebrations. Battery operated string lights eliminate the need for nearby outlets and provide flexibility in placement without unsightly cords running across walkways.
Create a Cozy Ceiling Light Canopy
Ceiling light canopies transform ordinary rooms into magical celebration spaces by creating an overhead focal point that draws the eye upward. Start from the center of the room and work outward, securing lights to ceiling hooks or temporary anchor points. Vary the height of different strands to create depth and visual interest rather than a flat, uniform appearance.
Combine different lengths of string lights to achieve a cascading effect that feels organic and whimsical. Living rooms with higher ceilings work best for this technique, allowing the lights to drape naturally without creating a cramped feeling. Warm white or soft yellow tones create the most inviting atmosphere while avoiding harsh brightness that can overwhelm the space.
Wrap Lights Around Furniture and Plants
Furniture wrapped in string lights becomes sculptural elements that add warmth and dimension to your birthday decoration scheme. Focus on pieces with interesting shapes like bookshelves, stair railings, or decorative room dividers that can showcase the light patterns effectively. Wrap the lights loosely to maintain the furniture’s natural lines while creating gentle illumination.
Large houseplants provide excellent natural frameworks for string light displays that feel organic and sophisticated. Potted trees, tall leafy plants, or even artificial greenery can serve as beautiful light structures. Secure lights to plant supports or decorative stakes to prevent damage to living plants while creating stunning backlit effects that complement your other birthday decorations perfectly.
Craft Personalized Photo Memory Walls

Creating a photo memory wall transforms your birthday celebration into a heartfelt tribute while adding meaningful decoration to your space. This personal touch showcases cherished moments and creates an captivating focal point that guests will love exploring.
Gather Favorite Birthday Person Photos
Start by collecting meaningful photographs that span different life stages and memorable moments of the birthday person. We recommend selecting 15-20 photos that include family gatherings, milestone achievements, candid moments, and special occasions to create a comprehensive visual story.
Digital photos work perfectly for this project since you can print them in various sizes at local photo centers or using home printers. Mix different photo sizes like 4×6 standard prints, 5×7 portraits, and smaller wallet sized images to create visual interest and depth on your memory wall.
Consider including childhood photos alongside recent pictures to showcase the person’s journey through life. Photos with friends, family members, pets, and favorite activities help create a well rounded display that celebrates all aspects of their personality and relationships.
Use Clothespins and Twine for Rustic Display
Thread baker’s twine or natural jute rope horizontally across your chosen wall space, securing each end with small nails or adhesive hooks. We suggest creating multiple parallel lines spaced 12-15 inches apart to accommodate different photo arrangements and sizes.
Wooden clothespins provide the perfect rustic touch for attaching photos to your twine lines while allowing easy repositioning throughout the party. Choose natural wood clothespins or paint them in coordinating colors that match your overall birthday decoration theme.
Arrange photos in clusters rather than perfect rows to create an organic, lived in appearance that feels more personal and inviting. Layer some photos slightly overlapping others to add dimension and visual movement to your memory wall display.
Add Polaroid-Style Photo Frames
Enhance your photo display with instant camera style frames that give modern photos a nostalgic, vintage appearance. These frames typically feature white borders with space at the bottom for handwritten captions or dates, mimicking the classic Polaroid aesthetic.
Print your selected photos with white borders or purchase stick on Polaroid frames from create stores to achieve this timeless look. We recommend writing short memories, inside jokes, or meaningful dates below each photo to add personal storytelling elements that guests can read and enjoy.
Mix framed and unframed photos throughout your display to create texture and visual variety while maintaining the cohesive rustic theme. The combination of clothespin attached photos and Polaroid style frames creates an Instagram worthy backdrop that encourages guests to take their own memorable pictures.
Build Simple Themed Table Centerpieces

We’ll transform your dining space into a festive focal point using everyday items that create stunning visual impact. Building themed centerpieces doesn’t require expensive materials when you combine creativity with strategic placement techniques.
Fill Mason Jars with Seasonal Flowers
Mason jars make perfect vases for fresh or artificial seasonal flowers that complement your birthday theme colors. We recommend choosing blooms that match your celebration’s color palette, such as bright yellows and oranges for summer birthdays or deep reds and purples for autumn celebrations. Fill multiple jars of varying heights to create depth across your table surface.
Position these floral arrangements strategically around your table or use them as backdrop elements for photo opportunities. Fresh flowers like daisies, roses, or seasonal picks from your garden work beautifully, while artificial options provide longer lasting beauty without maintenance concerns. We’ve found that grouping three to five mason jars together creates the most visually appealing cluster effect.
Stack Books with Small Decorative Items
Books become elegant pedestals when you stack hardcover volumes of different heights throughout your centerpiece arrangement. We suggest using books that relate to the birthday person’s interests or hobbies, creating conversation starters while serving as functional decoration bases. Stack two to four books per grouping, alternating spine directions for visual interest.
Top each book stack with themed decorative items like miniature figurines, small photo frames, or birthday themed accessories. Candles placed on book stacks add height variation while LED tea lights provide safe ambient lighting options. We’ve discovered that incorporating the birthday person’s favorite collectibles or hobby items makes these centerpieces deeply personal and meaningful.
Use Candles for Ambient Lighting Effects
Candles create warm atmospheric lighting that transforms any birthday table into an intimate celebration space. We recommend mixing real candles with LED alternatives to ensure safety while maintaining that cozy glow throughout your party. Place candles in mason jars, elegant holders, or directly among your centerpiece elements for layered lighting effects.
Battery operated LED candles work perfectly for families with young children while still providing that flickering ambiance everyone loves. Position taller candles behind shorter decorative elements to create depth without blocking sight lines across your table. We’ve found that using candles in your theme colors or metallic holders elevates the entire centerpiece arrangement while keeping costs minimal.
Make Easy Streamers and Garland Decorations

We’ll transform your space with handmade streamers and garlands that cost just a few dollars but deliver stunning visual impact. These flowing decorations add movement and color to complement your existing balloon backdrop and photo memory wall perfectly.
Cut Crepe Paper into Flowing Strips
Purchase crepe paper in colors that match your established birthday theme for seamless coordination with your other decorations. Cut long strips measuring 1.5–2 inches wide and 2–3 feet long to create the most ever-changing visual effect. Multiple strips hung together from ceilings or doorways generate festive movement that catches light beautifully throughout your celebration space. We recommend cutting at least 10–15 strips per hanging location to achieve full, abundant coverage that photographs well.
Create Paper Circle Garlands
Use construction paper, scrapbook paper, or cardstock in multiple complementary colors to create charming circle garlands. Cut circles approximately 2 inches in diameter using scissors or a circle punch for consistent sizing across all pieces. Thread the circles onto string or ribbon using a needle while spacing them evenly about 3–4 inches apart for optimal visual balance. This simple technique works perfectly for all ages and creates Instagram worthy backdrops when paired with your existing string lights and centerpieces.
Hang from Ceilings and Doorways
Attach streamers and circle garlands securely to ceilings, doorways, or walls using tape or removable adhesive hooks that won’t damage surfaces. Drape streamers diagonally across room corners to add dimensional interest that complements your balloon wall arrangement. Layer circle garlands with your existing decorations by positioning them at varying heights throughout the space. Command strips work exceptionally well for hanging both types of decorations without leaving marks on painted walls or ceilings.
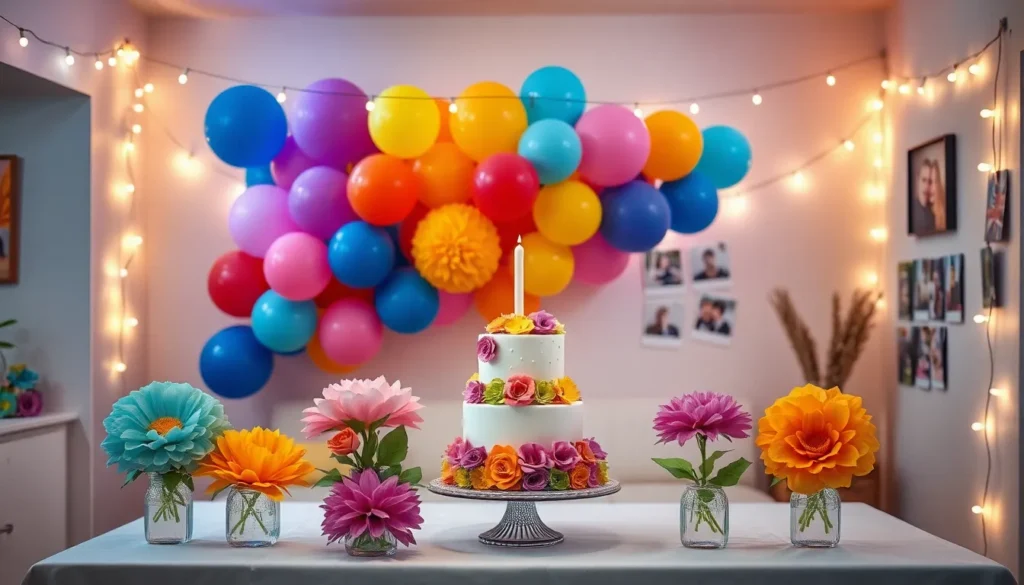
Design a Festive Food and Cake Display Area

Creating an eye-catching food display elevates your birthday decorations and provides a stunning focal point that complements your balloon backdrop and photo memory wall. We’ll transform your dining area into a professional looking dessert station using simple techniques that maximize visual impact.
Use Tiered Stands for Height Variation
Tiered stands create dramatic visual interest by displaying food and cakes at different heights throughout your buffet area. We recommend positioning your birthday cake on the tallest tier while placing cupcakes and finger foods on lower levels to guide guests’ eyes naturally across the spread. Three tier cake stands work perfectly for this purpose, allowing you to showcase desserts while freeing up valuable table space.
Wooden cutting boards stacked on books serve as excellent DIY alternatives when you don’t have formal tiered stands available. We suggest using sturdy hardcover books that match your birthday theme colors as pedestals for serving plates. Glass cake pedestals paired with wooden serving boards create elegant height differences that photograph beautifully against your string light backdrop.
Mixing different materials like metal, wood, and glass adds texture while maintaining the cohesive look you’ve established with your other decorations. We find that odd numbered groupings of three or five different heights create the most pleasing visual arrangement for birthday food displays.
Add Decorative Tablecloths and Runners
Tablecloths and runners instantly transform ordinary tables into festive birthday decoration focal points that tie your entire theme together. We recommend choosing colors that complement your balloon backdrop and paper flower arrangements for maximum visual cohesion. Solid colored tablecloths work best as bases, allowing patterned runners to add visual interest without overwhelming the food presentation.
Table runners in metallic tones like gold or silver echo the sparkle from your balloon clusters while creating sophisticated pathways for food placement. We suggest positioning runners diagonally across round tables or lengthwise on rectangular surfaces to guide guests naturally toward the birthday cake display. Fabric runners with subtle birthday themed patterns add festive touches without competing with your food presentation.
Layering different textures creates depth that photographs well alongside your photo memory wall and string light canopy. We often combine burlap runners with satin tablecloths for rustic elegance, or pair sequined runners with solid colored linens for glamorous birthday celebrations.
Include Birthday-Themed Serving Accessories
Birthday themed plates, cups, and serving utensils complete your food display while reinforcing the celebratory atmosphere you’ve created throughout your space. We recommend selecting serving pieces that coordinate with your banner colors and paper flower arrangements for seamless visual flow. Disposable options in premium designs offer convenience while maintaining the polished look of your DIY decorations.
Serving utensils with decorative handles add special touches that guests notice and appreciate during the celebration. We suggest choosing pieces in metals that match your string light fixtures or balloon colors for consistent theming. Cake servers with rhinestone details or colorful ribbon wraps create Instagram worthy moments when cutting the birthday cake.
Napkins folded into creative shapes like flowers or fans add dimensional elements that complement your tissue paper blooms and streamer decorations. We find that mixing solid colored napkins with patterned ones in small groupings creates visual interest without cluttering the elegant display you’ve worked to achieve.
Conclusion
Creating beautiful birthday decorations at home doesn’t require a professional party planner or expensive supplies. With these simple DIY approaches we’ve shared you can transform any space into a celebration-worthy venue that feels personal and special.
The key lies in combining different elements thoughtfully – from balloon walls and paper flowers to string lights and memory displays. Each decoration technique we’ve covered works independently but together they create a cohesive festive atmosphere that’ll make any birthday person feel truly celebrated.
Remember that the most memorable parties come from the heart not the budget. By investing a little creativity and time into these simple decoration ideas you’re creating moments that’ll be treasured long after the candles are blown out.
Frequently Asked Questions
How can I create a memorable birthday party on a tight budget?
Focus on heartfelt touches rather than expensive decorations. Use everyday household items creatively, make DIY paper flowers from tissue paper, and create personalized photo memory walls. Simple elements like string lights, homemade banners, and thoughtful centerpieces using mason jars can transform your space without breaking the bank.
What’s the easiest way to make a balloon backdrop wall?
Select color-coordinated balloon clusters and use Command strips to attach them to your wall for easy removal. Incorporate metallic balloons for extra sparkle and arrange them in a visually appealing pattern. This creates a stunning focal point with minimal setup time and serves as a perfect photo backdrop.
How do I make DIY paper flowers for birthday decorations?
Cut tissue paper into layered squares, fold accordion-style, and secure the center with wire or string. Fan out the layers and separate each sheet to create full blooms. Mount on wooden dowels for versatile placement, and arrange in gradient colors for a sophisticated look throughout your party space.
What are some creative ways to use string lights for birthday decorations?
Try three techniques: drape warm white lights around doorframes for an enchanting entrance, create a ceiling canopy by securing lights from the center outward, and wrap lights around furniture and plants to add warmth and dimension. These methods instantly elevate your celebration atmosphere with minimal effort.
How can I create an impressive food display without professional equipment?
Use tiered stands or DIY alternatives like stacked books with wooden cutting boards to create height variation. Position the birthday cake on the tallest level and arrange smaller treats below. Add decorative tablecloths in theme colors and use birthday-themed serving accessories to complete the festive food presentation.
What makes a good photo memory wall for birthdays?
Gather 15-20 favorite photos spanning different life stages of the birthday person. Use clothespins and twine for a rustic display that allows easy repositioning, or add Polaroid-style frames for a nostalgic touch. This creates an Instagram-worthy backdrop that encourages guest interaction and celebrates meaningful memories.
How do I make simple themed table centerpieces?
Fill mason jars with seasonal flowers matching your theme colors and position them strategically for depth. Stack books related to the birthday person’s interests as pedestals for decorative items. Mix real and LED candles for safe ambient lighting that enhances the cozy atmosphere of your celebration.
What’s the best way to hang a birthday banner for maximum impact?
Use free downloadable letter templates to create personalized banners on durable cardstock. Customize colors and sizes to match your theme, and hang the banner at eye level where guests will naturally look. This ensures maximum visibility and creates a cohesive, professional-looking festive atmosphere.