Feeling overwhelmed by the chaos on your desk? You’re not alone. Many of us struggle to keep our workspaces organized, which can seriously affect our focus and productivity. That’s why I created this post. I wanted to gather some of the best desk organization ideas to help you create a clean, inspiring spot to work.
If you’re someone who craves a clutter-free workspace or just wants to level up your home office decor, you’re in the right place. This post is all about simple yet effective solutions that anyone can implement. We’re diving into minimalist desk accessories, clever storage hacks, and even some productivity tips that make a real difference.
Inside, you’ll discover over 25 ideas that not only beautify your desk but also enhance your workflow. From floating shelves to personalized desk plants, each suggestion aims to help you create an organized and motivating environment. By the end, you’ll have practical strategies and stylish solutions to transform your workspace and boost your productivity. Let’s get started on your journey to a more focused and effective you!
Key Takeaways
– Discover over 25 practical desk organization ideas that fit a minimalist aesthetic.
– Explore stylish desk accessories that double as decor and functional tools.
– Learn how cable management solutions can simplify your workspace and reduce visual clutter.
– Find effective under-desk storage options that maximize space without compromising style.
– Get tips on creating a clean desktop and the benefits of digital decluttering for better focus.
1. Minimalist Desk Accessories

Choosing minimalist desk accessories can truly elevate your workspace. Think sleek pencil holders and simple organizers that keep your essentials accessible without cluttering your desk. Pinterest showcases these designs as they promote a calm and focused environment. Using clear or neutral colors helps maintain an airy feel, while materials like wood or metal add a touch of sophistication.
To implement this style affordably, consider shopping at local thrift stores or online marketplaces. You can also create your own organizers using recycled materials. By embracing minimalist accessories, you create a serene workspace that encourages productivity and creativity.
• Choose clear or muted colors for an open feel.
• Use trays to group similar items together.
• Thrift or DIY accessories for a budget-friendly option.
• Regularly refresh your setup with seasonal changes.
Minimalist Desk Accessories
Editor’s Choice

Pen Holder,Nordic Style Silicone Waterproof Pencil Holder for Desk Simpl…

Demigo Acacia Wood Desk Organizer Tray – 9.5×6.7×2 Inch Letter & Station…

LA JOLIE MUSE Storage Basket Set of 3 with Leather Lids Fluted Cardboard…
2. Floating Shelves

Floating shelves provide a stylish way to utilize vertical space in your office. They let you showcase decorative items while keeping your desk neat. Arrange books, small plants, or framed photos for a balanced look that enhances your workspace. Many design blogs highlight this trend as a clever way to maximize storage.
To make the most of floating shelves, place them at different heights for added visual interest. You can find affordable shelves at many home goods stores. By using these shelves, you not only save space but also create an inspiring environment that reflects your personality.
• Install floating shelves to save desk space.
• Group items by theme for a cohesive look.
• Choose affordable shelves at home goods stores.
• Change decor frequently for a fresh appearance.
Floating Shelves
Editor’s Choice

BAYKA Floating Shelves for Wall, Wall Mounted Rustic Wood Shelves for Ba…

Desk Organizer and Accessories, 4-Tier Desktop File Organizer with Drawe…

PlantPod Luxe – Self-Watering Wall Planters (Set of 6) – Easy to Water a…
3. Cable Management Solutions

Tangled cables can be a major distraction in any workspace. Implementing cable management solutions helps maintain a tidy and organized area. Use cable clips, sleeves, or boxes to keep cords under control. Many DIY blogs suggest color-coding or labeling cables for easy identification and access.
For a budget-friendly approach, adhesive clips are great for under your desk, keeping cords off the floor. By organizing your cables, you create a cleaner workspace that allows you to focus on the task at hand without distractions.
• Use cable clips to keep cords off the floor.
• Choose a cable box that matches your decor.
• Avoid clutter by limiting devices connected.
• Regularly check your cables for maintenance.
Cable Management Solutions
Editor’s Choice

SOULWIT 50Pcs Self Adhesive Cable Management Clips, Cable Organizers Wir…

2 Pack Large Cable Management Box – Wooden Style Cord Organizer and Cove…

Alex Tech 25ft – 1/2 inch Cord Protector Wire Loom Tubing Cable Sleeve S…
4. Desk Organizers with Drawers

Desk organizers with drawers are essential for keeping your workspace tidy. They provide hidden storage for items like pens, post-its, and paperwork while maximizing vertical space. Consider materials like bamboo or acrylic for a stylish yet functional look. Many design trends favor organizers that blend practicality with aesthetics.
To keep your drawers organized, sort items by use. Use dividers to categorize similar items, making retrieval quick and easy. This setup ensures a clean workspace that feels inviting and efficient for all your tasks.
• Sort items by frequency of use for easy access.
• Regularly declutter to keep only essentials.
• Use dividers to categorize items.
• Label drawers for quick identification.
Fun fact: desk organizers with drawers can boost focus by up to 25% when you sort items by use. Use dividers and choose bamboo or acrylic to maximize vertical space and keep desk organization ideas simple and stylish.
Desk Organizers with Drawers
Editor’s Choice

ZOOFOX Bamboo Desk Organizer with Adjustable File Holder, Mail Organizer…

Desk Organizer with 2 Vertical File Holder, 4 Tier Stackable Paper Lette…

SpaceAid Bamboo Drawer Dividers with Inserts and Labels, Kitchen Adjusta…
5. A Clean Desktop

A clean desktop is the foundation of a productive workspace. Make it a daily habit to remove unneeded items before you start working. Keep only essentials like your laptop, a notepad, and a drink to minimize distractions. Design trends emphasize the importance of simplicity for clarity in your work environment.
To maintain a clean desktop, dedicate a few minutes each day to decluttering. At day’s end, return items to their designated spots. This practice creates a more organized, peaceful workspace that sets the right tone for productivity.
• Perform daily decluttering sessions for a fresh start.
• At the end of the day, return items to their places.
• Use under-desk storage for rarely used items.
• Consider a single decorative item for personality.
A Clean Desktop
Editor’s Choice

5 Drawer Mobile File Cabinet Under Desk Storage Organization with Wheels…

Der Rose 2 Pack Small Fake Plants Mini Artificial Potted Plants for Tabl…

Amazon Basics Wide Ruled Lined Writing Note Pads, 8.5 inch x 11.75 inch,…
6. Inspirational Mood Board

An inspirational mood board can keep you motivated as you work. This could be a corkboard where you display quotes, images, or color swatches that resonate with you. Many creatives use this method to add a personal touch to their desks while staying focused on their goals.
To create a cohesive theme, use similar colors and styles for your board. Regularly update it to keep your inspiration fresh. This board can transform your workspace into a motivating environment that encourages creativity and productivity.
• Regularly update your mood board for fresh inspiration.
• Use matching tape or pins for a cohesive look.
• Keep it clutter-free with key pieces only.
• Position it where you can easily see it daily.
Inspirational Mood Board
Editor’s Choice

Large Cork Board Alternative | 15 Pack | Sizing Up to 59”x36”, Felt Wall…

60 Pcs Push Pins, Thumb Tacks for Decorative Wall, Pearl White Thumbtack…

9 Pieces Inspirational Phrases Wall Art Prints Motivational Sayings Quot…
7. Clear Containers for Office Supplies

Clear containers are a simple solution for keeping your office supplies organized. They allow you to see everything at a glance, making it easy to find what you need. These containers can fit neatly on shelves or desktops, enhancing your overall workspace aesthetic.
When selecting containers, choose various sizes to store everything from paper clips to sticky notes. Labeling each container adds style and boosts accessibility. By organizing your supplies this way, you create a clean and efficient workspace that feels inviting.
• Sort items by category for better organization.
• Choose containers that fit your desk’s color scheme.
• Consider stackable options to save space.
• Regularly check contents to maintain order.
Clear Containers for Office Supplies
Editor’s Choice
Desk Organizer with 2 Vertical File Holder, 4 Tier Stackable Paper Lette…

DYMO Label Maker, LetraTag 100H Silver Handheld Label Maker & LT Label T…
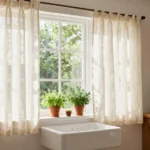
8. Personalized Desk Plants

Incorporating plants into your workspace can improve your mood and boost productivity. Low-maintenance options, like succulents or snake plants, require minimal care while adding a vibrant touch. Position them near your computer or in a sunny spot for the best effect.
To choose the right pots, find ones that match your desk decor. Ensure the pots have drainage holes to prevent overwatering. By adding greenery, you create a more refreshing and lively workspace that inspires creativity.
• Choose pots that complement your decor.
• Ensure drainage holes to prevent overwatering.
• Rotate plants regularly for even growth.
• Position plants where they get adequate light.
Fun fact: adding desk plants can lift mood and boost focus by up to 12–15%—perfect for your desk organization ideas. Succulents or snake plants thrive on minimal care, yet they dramatically refresh your workspace and spark creativity.
Personalized Desk Plants
Editor’s Choice

Artificial Succulent Plants Fake Potted Indoor with Ceramic Pot – Home O…

Essential Houseplant Collection (4PK) Live Plants Indoor Plants Live Hou…

Gepege 6 Inch Beaded Ceramic Planter Set of 2 with Drainage Hole and Sau…
9. Minimalist Desk Calendars

A minimalist desk calendar helps you stay organized while adding style to your workspace. Opt for a simple design that blends with your decor, and place it in an easily visible area. This way, you can track deadlines while maintaining a clean look.
Consider digital calendars that sync with your devices, or choose a classic paper calendar you can customize with notes. By integrating a calendar, you enhance your organizational skills while keeping your workspace chic.
• Mark important dates clearly on your calendar.
• Use different colors for various tasks.
• Regularly update it to maintain organization.
• Place it in an area you frequently look at.
Minimalist Desk Calendars
Editor’s Choice

Aesthetic 2025-2026 Desk Calendar – Runs From June 2025 Until December 2…

ApoloSign 15.6-inch Digital Calendar: Dual Mode Calendar with Google Pla…

Essentials Month By Month Planner Stickers (set of 475 stickers)
10. Under-Desk Storage Solutions

Making use of under-desk storage can greatly improve organization in smaller spaces. Consider using rolling carts or drawers that slide under your desk, providing room for files, supplies, and personal items. This keeps your desktop clear while ensuring everything you need is within reach.
Select storage solutions that are easy to slide in and out for hassle-free access. By organizing your items this way, you create a more efficient workspace that encourages focus and productivity.
• Group similar items together for better organization.
• Use labeled bins for efficient sorting.
• Ensure storage complements your overall design.
• Regularly check contents to avoid over-cluttering.
Under-Desk Storage Solutions
Editor’s Choice

YASONIC 3 Tier Rolling Cart – Metal Utility Cart with Wheels, Hanging Cu…

Under Desk Table Drawer Storage Organizer,3 Pack Large & Medium & Small …

artsdi 11 Inch Storage Cube,Storage bin (Set of 10) Foldable Fabric Cube…
11. Digital Decluttering

Don’t overlook the digital side of organization! A cluttered digital workspace can be just as distracting as a messy physical desk. Regularly declutter your digital files by organizing them into folders and deleting what you no longer need.
Using cloud storage can free up space and keep your documents accessible without cluttering your physical workspace. By taking control of your digital environment, you can enhance focus and efficiency in your work.
• Use a consistent naming convention for easy retrieval.
• Set aside time weekly for file management.
• Consider productivity apps for task tracking.
• Regularly review files to keep only what’s necessary.
Digital Decluttering
Editor’s Choice

Seagate Portable 2TB External Hard Drive HDD — USB 3.0 for PC, Mac, Play…

MICROSOFT ONEDRIVE AND GOOGLE DRIVE FOR BEGINNERS 2023 Edition: A Master…
12. Wall-Mounted Organizers

Wall-mounted organizers can save precious desk space while keeping essential items close at hand. These can include racks, baskets, or magnetic strips for tools. They not only tidy up your workspace but also add a creative flair to your decor.
Choose organizers that suit your style and are easy to access. By implementing wall-mounted options, you create a more organized and visually appealing workspace that enhances your productivity.
• Measure wall space before purchasing organizers.
• Group similar items together for efficiency.
• Layer different types of organizers for a dynamic look.
• Choose materials that complement your decor.
Wall-Mounted Organizers
Editor’s Choice
![Joben Oligey 3 Set [Extra Large] Hanging Wall Baskets ,Wire Basket For S...](https://m.media-amazon.com/images/I/81wfSbFkk0L._AC_UL320_.jpg "25+ Desk Organization Ideas to Boost Focus and Productivity 75")
Joben Oligey 3 Set [Extra Large] Hanging Wall Baskets ,Wire Basket For S…

Wall-Mounted Pegboard Kit, 25.2″ x 25.2″ Organizer Panel – Large, Cost-E…

3-Tier Magnetic File Holder, No Drilling Installation File Cabinet Organ…
13. Color-Coded Folders

Upgrade your organization with color-coded folders! They make finding documents much easier and add a splash of fun to your work. Assign colors based on categories or projects to speed up retrieval time.
Store these folders in a file cabinet or box to keep everything neat. By using color-coded systems, you can enhance both efficiency and enjoyment in your workspace.
• Label each folder clearly for visibility.
• Regularly sort through to remove irrelevant documents.
• Choose high-quality folders for durability.
• Keep similar items together for better organization.
Color-Coded Folders
Editor’s Choice

Two Tone Color File Folders 8.5 x 11 Inch, 1/3 Cut Tab File Folders Lett…

Kuntine.B Desk File Organizer 5 Sections Upright Mesh Desktop Organizer …
DYMO Label Maker, LetraTag 100H Silver Handheld Label Maker & LT Label T…
14. Desk Pad for Protection and Style

A stylish desk pad offers protection for your surface while enhancing your workspace’s look. Select a pad that matches your decor—whether it’s sleek leather or a soft fabric. These pads create a unified appearance and can help define your workspace.
Look for options with built-in features like pen holders or note sections for added functionality. By choosing a desk pad, you blend style with practicality for a more inviting workspace.
• Consider size based on your desk dimensions.
• Regularly clean your desk pad to maintain its condition.
• Coordinate colors with other desk accessories.
• Choose materials that fit your style.
Desk Pad for Protection and Style
Editor’s Choice

Aothia Leather Office Desk Pad Protector, Non-Slip PU Leather Desk Blott…

DawnTrees Felt Desk Pad,Keyboard Mat (35.8×11.8Inches),Large Felt Mouse …

Large Desk Mat 47.2″ x 17″ Leather Desk Pad Protector with Natural Cork …
15. Task Lighting

Good lighting is essential for maintaining focus in your workspace. A stylish task lamp not only provides targeted light but also enhances your desk’s decor. Look for adjustable designs so you can direct light where it’s needed most.
Choose warm-toned bulbs for a calming atmosphere that’s easy on the eyes during long sessions. By integrating quality lighting, you create a workspace that fosters productivity and comfort.
• Position your lamp to avoid glare on screens.
• Consider smart bulbs that adjust for various tasks.
• Match lamp style with your overall decor.
• Use a lamp with a flexible arm for versatility.
Task Lighting
Editor’s Choice

TORCHSTAR Metal Desk Lamp with Clamp, Swing Arm, Architect Adjustable Go…

A19 E26 Amber Light Bulbs 2200K Soft Warm, Vintage LED Edison Bulbs 60 W…

LED Desk Lamp with USB Ports,Touch Desk Lamps for Home Office with 5 Col…
16. Creative Paperclip Displays

Turn ordinary paperclips into fun desk decor! Use a decorative bowl or a magnetized holder to keep them organized while adding style to your workspace. This simple touch can brighten your desk and keep things neat.
Consider using colorful or uniquely shaped clips that reflect your personality. By displaying your paperclips creatively, you can make your workspace more inviting and enjoyable.
• Change display items seasonally for a fresh look.
• Position holders where they’re easily accessible.
• Combine with other small decorative items for visual interest.
• Keep it simple to avoid clutter.
Creative Paperclip Displays
Editor’s Choice

Paper Clip Holder Ceramic Round Paper Clips Dispenser for Desk Cute,Gold…

Paper Clips, 240pcs Medium Size Colored, PaperClips Assorted Colors, Pap…

Kate Aspen Geometric Ceramic Planters Decorative Bowls, Small & Medium (…
17. Easy Access Notepads

Having notepads available can boost your productivity. Choose a minimalist design that suits your decor and keep it within arm’s reach. Consider options with sticky notes or tear-off pages for quick reminders.
Organizing your notes helps keep your thoughts clear and your workspace tidy. By having easy access to notepads, you can jot down ideas without losing focus.
• Keep a few notepads available: lined, blank, and sticky notes.
• Review your notes regularly to keep them relevant.
• Use a small holder to keep them organized.
• Position them in a spot that’s easy to reach.
Easy Access Notepads
Editor’s Choice

Minimalist 3×5 Leather Memo Pad Cover Notepad Holder Police Gear, Smooth…

Post-it Super Sticky Notes, 24 Sticky Note Pads, 3 x 3 in., School Suppl…

Paper Junkie Notebook Pack – A6 (4 x 6 In), Kraft Paper, 12-Pack, Lined …
18. Stylish Clipboards

Clipboards can be a stylish way to manage documents while adding flair to your desk. Choose designs that fit your decor, whether they are wooden or metallic. Hang them on the wall or keep them on your desk for easy access.
Using clipboards helps you stay organized while also making it easier to view and manage tasks. By incorporating clipboards, you can add both function and style to your workspace.
• Rotate documents regularly for a fresh look.
• Use multiple clipboards for different projects.
• Consider adding a small calendar for quick reference.
• Position them where they can be easily accessed.
Stylish Clipboards
Editor’s Choice

Officemate Recycled Wood Clipboard, Letter Size, 9″ x 12.5″ with 6″ Clip…

Amazon Basics Aluminum Office Clipboard, Letter Size, Pack of 2, Metal

Amazon Basics Colorful, Sturdy, Lightweight Plastic Clipboards, Pack of …
19. Drawer Dividers

Drawer dividers can be a secret weapon for desk organization. They help keep clutter at bay by sorting items neatly. Choose adjustable dividers to accommodate different drawer sizes and types of items.
This way, everything has its place, making it easy to find what you need. By using dividers, you can create a more organized workspace that minimizes frustration.
• Sort items by type for better organization.
• Regularly check drawers to ensure everything is in order.
• Color-code items if possible for quick identification.
• Use dividers that are easy to adjust.
Drawer Dividers
Editor’s Choice

Lifewit 5 Pack Drawer Dividers 4″ High, 11-17″ Adjustable Dresser Drawer…

Avery Color-Coding Removable Labels, 1/2″ x 1-3/4″, Assorted Neon Colors…

Marbrasse Expandable Desk Drawer Organizer, Mesh Drawer Organizer Tray w…
20. Magazine Holders for Documents

Transform magazine holders into chic document organizers. Instead of letting papers pile up, use these holders to keep everything tidy. Select designs that fit your workspace style, whether sleek metal or colorful patterns.
This makes it easy to grab important documents without searching through messy stacks. By implementing magazine holders, you can maintain a more organized and efficient workspace.
• Label each holder clearly for easy identification.
• Keep only current documents accessible; store older ones elsewhere.
• Regularly review contents to prevent clutter buildup.
• Choose holders that match your decor.
Magazine Holders for Documents
Editor’s Choice

Amazon Basics Plastic Desk Organizer – Vertical Magazine and File Holder…

Brother P-Touch PTD220 Home/Office Everyday Label Maker | Prints TZe Lab…

15 PCS Interlocking Desk Drawer Organizer Separator for Office,Bathroom,…
21. Stylish Waste Bins

A stylish waste bin can be both practical and attractive. Pick a minimalist design that complements your desk while providing a designated spot for trash. A bin with a lid can also help keep odors away.
Position it conveniently under or beside your desk for easy access. By choosing an aesthetically pleasing waste bin, you enhance the overall look of your workspace while encouraging cleanliness.
• Regularly empty the bin to keep your workspace fresh.
• Choose a color or material that matches your style.
• Consider a recycling bin to promote eco-friendly habits.
• Look for bins with multiple compartments.
Stylish Waste Bins
Editor’s Choice

Bathroom Trash Can, Small Garbage Can for Bedroom, Living Room, Kitchen,…

Glad 13 Gallon Trash Can | Plastic Kitchen Waste Bin with Odor Protectio…

Storex Letter Size Flat Storage Tray – Organizer Bin for Classroom, Offi…
22. Office Supply Cart

An office supply cart can be a fantastic mobile storage solution. This versatile piece can hold everything from notebooks to stationery and can be moved aside when not in use. Opt for carts with wheels for easy transportation that match your decor.
Using bins or baskets inside the cart can help with sorting. By organizing your supplies this way, you create a practical and stylish workspace that adapts to your needs.
• Use bins or baskets within the cart for better sorting.
• Consider using the top as a temporary workspace.
• Regularly review items stored in the cart to ensure utility.
• Choose a cart that fits your workspace aesthetic.
Did you know a mobile office cart is one of the desk organization ideas that can cut desk clutter by up to 40%? Use bins inside for better sorting, and your minimalist desk stays calm as you move essentials where you need them. A simple cart equals smoother focus.
Office Supply Cart
Editor’s Choice
YASONIC 3 Tier Rolling Cart – Metal Utility Cart with Wheels, Hanging Cu…

IRIS USA 6 Qt. Plastic Storage Bins Containers with Lids, 4 Pack, Small …

Marbrasse Pen Organizer with 2 Drawer, Multi-Functional Pencil Holder fo…
23. Desktop File Holders

Desktop file holders offer a stylish way to sort paperwork and keep your desk clean. Look for designs that combine function and beauty. Place them at the back of your desk for easy access while maintaining a tidy appearance.
Utilize these holders for active projects or documents that require frequent attention. By organizing your paperwork this way, you enhance both your efficiency and your workspace’s look.
• Regularly sort through papers to prevent overflow.
• Label each holder for easy access.
• Choose colors or materials that harmonize with your desk decor.
• Keep only necessary documents in active holders.
Desktop File Holders
Editor’s Choice
Kuntine.B Desk File Organizer 5 Sections Upright Mesh Desktop Organizer …

Brother P-Touch, PTD210, Easy-to-Use Label Maker Bundle (4 Label Tapes I…
Marbrasse Expandable Desk Drawer Organizer, Mesh Drawer Organizer Tray w…
24. Decorative Sticky Notes

Add some fun to your organization with decorative sticky notes. They’re perfect for jotting down quick reminders or motivational quotes. Choose colorful designs that brighten your workspace and keep your tasks engaging.
Place them on your desk or on a wall-mounted board for easy visibility. By using decorative notes, you can make your workspace more enjoyable while staying organized.
• Limit sticky notes to avoid clutter.
• Use different colors for various categories.
• Regularly rotate messages to keep them fresh.
• Position them where you frequently look.
Decorative Sticky Notes
Editor’s Choice

Clabby 15 Pads Pop up Sticky Notes 3 x 3 Inch Floral Sticky Notes Refill…

U Brands Cork Bulletin Board, 18″ x 24″ Inches, Light Birch Wood Frame (…
25. Time Management Tools

Time management tools can help keep your tasks organized while enhancing your workspace. Consider a visual timer or hourglass that serves as both a practical tool and a decorative piece. Having a timer visible can boost your productivity and time awareness.
Look for styles that enhance your workspace’s appearance without distracting you. By integrating time management tools, you create a more focused and efficient work environment.
• Set specific time blocks for tasks to maintain focus.
• Regularly review your progress to stay on track.
• Use a planner alongside a timer for enhanced organization.
• Choose tools that match your workspace aesthetic.
Time Management Tools
Editor’s Choice

Yunbaoit Visual Timer with Night Light, 60-Minute Countdown Timer for Ki…

Large Hourglass Timer 60 Minute, Decorative Wooden Sandglass, Black

ADHD Planner for Focus & Productivity: Task Management Hub with Color-Co…
Conclusion

With these 25+ desk organization ideas, you can transform your workspace into a functional and visually appealing environment.
Embrace these minimalist solutions to keep clutter at bay and boost your focus and productivity.
Small changes can make a significant difference in how you feel while working, so why not start today?
Note: We aim to provide accurate product links, but some may occasionally expire or become unavailable. If this happens, please search directly on Amazon for the product or a suitable alternative.
This post contains Amazon affiliate links, meaning we may earn a small commission if you purchase through our links, at no extra cost to you.
Frequently Asked Questions
What Are Some Effective Desk Organization Ideas to Enhance Productivity?
To enhance your productivity, consider implementing a few effective desk organization ideas. Start by decluttering your workspace—remove items that don’t serve a purpose. Use organizers for desk accessories like pens and papers to create a streamlined look.
Another great tip is to utilize vertical space with shelves or wall-mounted organizers. This helps keep your workspace clutter-free while maintaining easy access to your most-used items.
How Can Minimalist Desk Organization Improve Focus?
A minimalist desk organization approach can significantly improve your focus. By reducing visual clutter, your brain can concentrate better on tasks at hand. Choose a few essential desk accessories that inspire you and keep only those on your desk.
Consider color-coordinated storage solutions to maintain a cohesive look, which can further help in reducing distractions and fostering a calm working environment.
What Are Some Practical Workspace Organization Tips for Home Offices?
For a functional home office, practical workspace organization tips include creating designated zones for different tasks. Use trays and bins to organize documents, and invest in quality desk accessories that suit your workflow. Additionally, keep your workspace well-lit and ergonomically friendly to maintain both comfort and productivity.
Don’t forget to personalize your space with decor that motivates you, making it a place you enjoy spending time in!
How Can I Maintain a Clutter-Free Workspace Over Time?
Maintaining a clutter-free workspace is all about establishing routines. Set aside a few minutes at the end of each day to tidy up and put things back in their designated spots. Consider adopting the ‘one in, one out’ rule—when you bring a new item into your workspace, remove an old one.
Regularly assess your desk organization ideas to ensure they still meet your needs, and don’t hesitate to adjust as your workflow changes. This habit will keep your space organized and inviting!
What Role Does Home Office Decor Play in Desk Organization?
Home office decor plays a vital role in desk organization by creating an inspiring and motivating environment. Choosing decor that reflects your style can enhance your mood and productivity.
Incorporate plants, artwork, or motivational quotes that resonate with you. Ensure these elements don’t contribute to clutter but rather complement your workspace organization strategy, making your home office a pleasant place to work every day.
Related Topics
desk organization ideas
minimalist desk
workspace organization
clutter-free workspace
home office decor
productivity tips
easy organization
budget friendly
stylish desk accessories
creative workspace
focused work environment
beginner friendly