We’ve all dreamed of having that perfect bedroom sanctuary – a space that reflects our personality while providing the comfort we crave after long days. The good news? You don’t need a massive budget or professional interior designer to transform your bedroom into a stunning retreat.
DIY bedroom projects offer an incredible opportunity to unleash your creativity while saving money. From simple wall treatments and custom storage answers to handmade decor and furniture makeovers, there’s a project for every skill level and budget. We’ll show you how small changes can make dramatic impacts and help you create a space that truly feels like home.
Whether you’re working with a tiny apartment bedroom or a spacious master suite, these DIY ideas will inspire you to roll up your sleeves and start creating. Let’s explore budget-friendly answers that’ll transform your bedroom into the personal oasis you’ve always wanted.
Create a Statement Wall With DIY Wall Art
Statement walls transform bedrooms into personalized retreats without requiring extensive renovations. We’ll explore three accessible DIY wall art techniques that create dramatic focal points while staying within budget.
Gallery Wall Using Personal Photos and Prints
Gallery walls showcase our favorite memories while adding visual interest to bedroom spaces. We recommend starting with a paper template system by cutting newspaper pieces to match each frame size and arranging them on the wall before hanging actual artwork.
Mix frame sizes and shapes to create ever-changing compositions that draw the eye upward. Square frames work beautifully alongside rectangular ones, while circular mirrors or prints add unexpected curves to the arrangement.
Choose a cohesive color palette for frames to maintain visual harmony throughout the display. Black frames create classic sophistication, while white frames offer clean modern appeal, and natural wood frames bring warmth to the space.
Include various print types such as family photos, inspirational quotes, vintage postcards, and botanical prints to create layers of meaning. We suggest limiting the color scheme to three main tones to prevent the wall from feeling chaotic.
Plan the layout on the floor first to experiment with different arrangements before committing to nail holes. Start with the largest piece as your anchor point and build outward, maintaining 2-3 inches between each frame for proper spacing.
Hand-Painted Accent Wall Designs
Hand painted accent walls offer unlimited creative possibilities for personalizing bedroom spaces. We find that simple geometric patterns work best for beginners, while more experienced DIY enthusiasts can tackle intricate murals or abstract designs.
Geometric patterns like triangles, hexagons, or stripes create modern sophistication with minimal artistic skill required. Use painter’s tape to achieve crisp lines and choose two or three coordinating colors from your existing bedroom palette.
Stenciled designs provide professional looking results without freehand painting skills. We recommend large scale botanical stencils, mandala patterns, or modern geometric shapes that complement your bedroom’s style and proportions.
Ombre effects create dreamy gradients perfect for bedroom walls behind headboards. Start with your lightest shade at the top and gradually blend darker tones toward the bottom using a large dry brush or sea sponge.
Textured painting techniques add depth and interest through methods like color washing, stippling, or dry brushing. These approaches work especially well in bedrooms with limited natural light as they create subtle shadows that change throughout the day.
Removable Wallpaper Installation
Removable wallpaper transforms bedroom walls temporarily, making it perfect for renters or those who frequently update their decor. We’ve found that peel and stick options have improved dramatically in recent years, offering better adhesion and easier removal.
Measure walls carefully before ordering wallpaper to ensure adequate coverage with minimal waste. Most removable wallpapers come in standard widths, so calculate the number of strips needed and add 10% extra for pattern matching and mistakes.
Prepare the surface properly by cleaning walls with mild soap and allowing them to dry completely. Remove any existing wallpaper residue or loose paint that might interfere with adhesion.
Start installation from the center of the wall and work outward to ensure pattern alignment remains consistent. Use a smoothing tool to eliminate air bubbles as you apply each strip, working from top to bottom.
Trim excess material with a sharp create knife for clean edges around outlets, switches, and ceiling lines. We recommend changing blades frequently to maintain crisp cuts that won’t tear the wallpaper.
Consider accent walls only if full room coverage feels overwhelming or expensive. Focus on the wall behind your headboard or the wall opposite your bed’s foot to create maximum visual impact with minimal investment.
Transform Your Lighting With Handmade Fixtures
 2")
Lighting transforms the entire atmosphere of our bedroom spaces while adding personal touches that reflect our unique style. Creating handmade fixtures allows us to customize both functionality and aesthetics without breaking the budget.
Mason Jar Pendant Lights
Mason jar pendant lights bring rustic charm and warm ambiance to any bedroom setting. We can attach mason jars to wooden or metal frames to create stunning overhead lighting that serves as both illumination and decor. Fill the jars with small candles for a romantic glow or add fairy lights for a magical sparkle effect.
Creating these fixtures requires basic materials like mason jars, pendant light cords, and a sturdy mounting system. We recommend using wide mouth jars for easier bulb installation and better light distribution. Paint the jar lids in metallic finishes like copper or brass to add sophisticated touches that complement existing bedroom hardware.
String Light Canopy Installation
String light canopies create magical overhead displays that transform ordinary bedrooms into enchanting retreats. We attach string lights to canopy frames or directly above beds using clear cable ties or small clips for secure positioning. This installation method ensures the lights stay in place while maintaining clean visual lines.
Choose warm white LED string lights for energy efficiency and longer lifespan compared to traditional bulbs. We can drape the lights in gentle curves or create geometric patterns depending on our preferred aesthetic. Installing dimmer switches allows us to adjust brightness levels for different moods throughout the day.
Position the lights at varying heights to create depth and visual interest across the ceiling space. We secure anchor points in ceiling joists or use adhesive hooks for temporary installations that won’t damage rental properties.
DIY Bedside Lamp Makeovers
DIY bedside lamp makeovers breathe new life into existing fixtures while creating personalized lighting answers. We can update old lamps with fresh paint jobs, new shades, or decorative elements that match our bedroom’s color scheme. Use materials like fabric, paper, or frosted glass to create unique shade designs that filter light beautifully.
Spray paint lamp bases in trending colors like matte black, sage green, or warm gold to instantly modernize dated fixtures. We wrap lamp bases with rope, twine, or decorative paper for textured finishes that add visual appeal. Replace standard lampshades with drum shades, bell shapes, or geometric designs to complement our bedroom’s style.
Consider adding USB charging ports to lamp bases for modern functionality that eliminates bedside clutter. We can install these features during makeover projects to create multi functional lighting answers that serve contemporary needs.
Build Custom Storage Solutions on a Budget
 4")
Maximizing storage in our bedrooms doesn’t require expensive custom carpentry or professional installation. We can create functional storage answers using affordable materials like plywood, MDF, or repurposed wood while utilizing vertical space to keep floor areas uncluttered.
Under-Bed Storage Boxes and Drawers
Under-bed storage transforms unused space into valuable organization areas for linens, out-of-season clothes, and luggage. We can build simple wooden boxes using pine boards and basic hardware, creating customized dimensions that perfectly fit our bed frame. Rolling drawer systems work exceptionally well for frequent access items, while sealed containers protect stored belongings from dust.
Bed risers elevate our mattress to create additional clearance for larger storage containers. These inexpensive accessories add 3-8 inches of height, allowing us to slide deeper boxes underneath without difficulty. DIY storage boxes cost approximately 60% less than store-bought alternatives when we use reclaimed wood or basic lumber from home improvement stores.
Floating Shelves for Small Spaces
Floating shelves maximize wall space without consuming precious floor area in compact bedrooms. We can construct these shelves using wooden planks and hidden brackets, creating clean lines that display decorative items, books, or personal accessories. Corner floating shelves use awkward spaces that typically remain empty, providing additional storage in tight quarters.
Installation requires basic tools including a drill, level, and stud finder to ensure secure mounting. We recommend spacing shelves 12-15 inches apart for optimal functionality and visual appeal. Weight capacity reaches 20-30 pounds per shelf when properly anchored into wall studs, making them suitable for heavier items like hardcover books or decorative storage boxes.
Repurposed Furniture Storage Hacks
Repurposing old furniture creates unique storage answers while reducing costs and environmental waste. We can transform vintage dressers into storage benches by adding cushioned tops, providing both seating and hidden storage compartments. Old ladders become vertical bookshelves when positioned against walls, offering rustic charm with practical functionality.
Nightstand alternatives emerge from unexpected items like wooden crates, vintage suitcases, or small filing cabinets. These pieces often cost less than $20 at thrift stores or garage sales, requiring minimal refinishing to match our bedroom decor. Storage ottomans double as seating when we add padding and fabric covers to sturdy wooden boxes or small chests, creating versatile furniture pieces that serve multiple purposes.
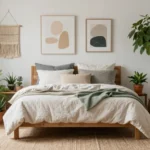
Design Your Own Headboard From Scratch
 6")
Creating a custom headboard transforms your bedroom into a personalized sanctuary while adding a stunning focal point above your bed. We’ll guide you through three distinct DIY approaches that cater to different skill levels and design preferences.
Upholstered Headboard Using Foam and Fabric
Materials you’ll need: Foam board, fabric of your choice, staples, and a reliable staple gun.
Starting with the foam board, cut it to your desired headboard dimensions using a sharp utility knife. Choose fabric that complements your bedroom’s color scheme and allows for at least 6 inches of overhang on all sides. Stretch the fabric tightly over the foam, ensuring smooth coverage without wrinkles or bubbles.
Secure the fabric to the back of the foam board using your staple gun, working from the center outward to maintain even tension. Pull corners taut and fold them neatly, similar to wrapping a gift. Attach the finished headboard to a wooden panel or mount it directly to your wall using appropriate hardware.
Customization options: We recommend experimenting with different fabric patterns, textures, and colors to match your personal style. Consider using velvet for luxury, linen for a casual feel, or bold patterns for a statement piece.
Rustic Wood Pallet Headboard Construction
Materials required: Pallet wood, 4×4 beams for legs, screws, and a power drill.
Begin by disassembling your pallets carefully, removing all nails and staples to avoid injury. Cut the pallet wood to your desired headboard size, ensuring all pieces are uniform in length. Sand the wood thoroughly to eliminate splinters and create a smooth surface.
Assemble your headboard frame by arranging the pallet wood pieces side by side, then secure them using horizontal support beams on the back. Add 4×4 beam legs for stability, positioning them at each end of the headboard. Drill pilot holes before inserting screws to prevent wood splitting.
Mount the completed headboard to your wall using heavy duty brackets, or attach it directly to your bed frame for additional support. Consider applying wood stain or paint to enhance the rustic appearance and protect the wood from moisture.
Macrame and Textile Headboard Ideas
Essential materials: Cotton rope, wooden dowels, and knowledge of basic macrame knots.
Start by creating your macrame pattern using square knots, half hitch knots, and spiral knots to achieve varied textures. Mount your cotton rope to wooden dowels, which will serve as the top anchor point for your design. Work downward in sections, maintaining consistent tension throughout your knotting process.
Attach the finished macrame piece to a wooden frame using small nails or screws, ensuring the frame dimensions match your headboard space. Hang your textile headboard from the wall using sturdy hooks rated for the weight of your creation.
Design variations: We suggest incorporating different rope thicknesses, adding wooden beads, or weaving in natural elements like dried flowers or feathers. This bohemian style works particularly well in bedrooms with neutral color palettes and natural textures.
These DIY headboard projects allow for complete customization while transforming your bedroom into a space that truly reflects your personality and creativity.
Refresh Your Bedroom With DIY Textile Projects
 8")
Textile projects offer some of the most rewarding ways to transform your bedroom’s atmosphere without major renovations. We’ll explore three key areas where fabric creativity can make the biggest impact on your space.
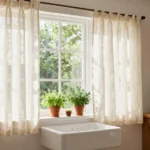
No-Sew Curtain and Window Treatment Ideas
Fabric adhesives eliminate the need for sewing skills while creating stunning window treatments that rival professional installations. We recommend using fabric clips to attach lightweight panels directly to curtain rods for an instant modern look.
Tension rods work perfectly with adhesive strips to secure fabric panels inside window frames. You can layer different fabric textures like cotton, linen, or sheer materials to create depth and visual interest.
Creative hanging methods include using rope, leather strips, or decorative chains to suspend fabric panels from ceiling-mounted hooks. These approaches give your windows a unique bohemian or industrial aesthetic that reflects your personal style.
Custom Throw Pillow Covers and Designs
Fabric paint transforms plain pillow covers into personalized accent pieces that tie your bedroom’s color scheme together. We suggest using stencils to create geometric patterns, floral designs, or typography that matches your room’s theme.
Applique techniques let you attach fabric scraps, old t-shirts, or decorative elements to create textured pillow surfaces. Iron-on patches, lace trim, or embroidered details add sophisticated touches without requiring advanced crafting skills.
Repurposing materials like vintage scarves, sweaters, or denim creates eco-friendly pillow covers with unique character. Old band t-shirts, fabric remnants from previous projects, or thrift store finds can become statement pieces that showcase your creativity.
Handmade Rugs and Floor Coverings
Woven fiber rugs using jute or sisal provide natural textures that ground your bedroom’s design while offering durability and comfort. We find these materials work especially well in bohemian or Scandinavian-inspired spaces.
Mosaic rug techniques involve braiding or weaving fabric strips from old clothes, sheets, or towels to create colorful floor coverings. You can arrange these strips in patterns or let colors blend naturally for an abstract design.
Rope rugs offer another accessible option where you spiral and secure rope sections with strong adhesive or stitching. These create perfect circular accent rugs for beside your bed or in reading nooks within your bedroom space.
Organize Your Space With Creative DIY Solutions
 10")
Organization doesn’t have to mean sacrificing style in your bedroom sanctuary. We’ll explore innovative DIY storage answers that transform clutter into beautiful displays while maximizing every inch of your space.
Jewelry and Accessory Display Systems
Vintage windows create stunning wall-mounted displays for your jewelry collection. Hang an old window frame on your wall and add small hooks or install a pegboard backing to showcase necklaces, bracelets, and earrings in an artistic arrangement.
Old doors transform into unique accessory storage when repurposed creatively. Attach decorative hooks along the door’s surface or mount a wooden dowel across the width to create hanging space for scarves, belts, and handbags. Position the door against a wall or mount it securely to serve as both functional storage and bedroom decor.
Shadow boxes offer another elegant solution for smaller jewelry pieces. Mount several matching boxes at varying heights to create visual interest while keeping rings, pins, and delicate items dust-free and organized.
Closet Organization Using Repurposed Materials
Wooden crates deliver custom shelving answers without the high cost of built-in systems. Stack and secure vintage wooden crates vertically or horizontally inside your closet to create compartments for folded clothes, shoes, and linens. Sand and stain the crates to match your bedroom’s aesthetic for a polished, intentional look.
Repurposed curtain rods become versatile organizational tools throughout your closet space. Install old rods at different heights to create additional hanging space for shorter items like shirts and skirts. Convert unused rods into belt and tie organizers by mounting them on closet walls or inside doors.
Mason jars mounted on wooden boards create visible storage for small accessories. Screw jar lids to a wooden plank and twist jars into place to store hair accessories, jewelry, or sewing supplies where you can easily see and access them.
Bedside Caddy and Nightstand Organizers
Bedside caddies maximize storage without taking up valuable floor space. Attach a fabric or wooden caddy directly to your bed frame to hold books, phones, glasses, and nighttime essentials within arm’s reach. Choose materials that complement your bedding and room decor for seamless integration.
Tiered trays transform nightstand surfaces from cluttered to organized in minutes. Use wooden or metal tiered trays to separate and display items like hand lotion, medications, journals, and charging cables. This vertical organization system keeps frequently used items accessible while maintaining a clean appearance.
Floating nightstand shelves work perfectly in smaller bedrooms where traditional nightstands won’t fit. Mount narrow shelves directly to the wall beside your bed and add small containers or dividers to organize your nighttime necessities without overwhelming the space.
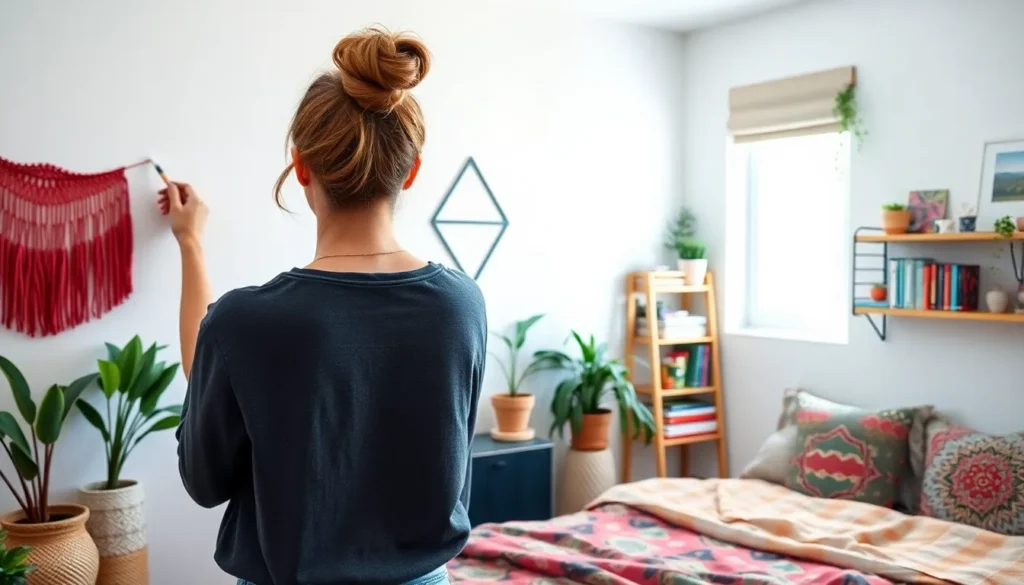
Add Personality With Handcrafted Decorative Elements
 12")
Handcrafted decorative elements transform ordinary bedrooms into personalized sanctuaries that reflect our unique style and creativity. Creating these custom pieces allows us to incorporate meaningful elements while maintaining budget-friendly answers.
Succulent and Plant Display Arrangements
Succulent arrangements require minimal care and bring natural vitality to our bedroom spaces. These hardy plants thrive in various containers and create refreshing focal points on bedside tables, wall shelves, or window sills.
Creative planters offer budget-friendly options for displaying our green friends. Terracotta pots provide classic appeal, while glass jars create modern minimalist displays. Upcycled tins add industrial charm and support sustainable decorating practices.
Grouping techniques enhance visual interest in our plant displays. Mixing different succulent varieties creates textural contrast and depth. Arranging plants at varying heights using books or small stands adds dimension to our arrangements.
Care considerations make succulents perfect for bedroom environments. Most varieties tolerate low light conditions and infrequent watering. Placing them near east or south-facing windows ensures optimal growth while maintaining our bedroom’s peaceful atmosphere.
DIY Mirror Frames and Decorative Accents
Custom mirror frames personalize our bedroom spaces while improving both style and function. These projects transform ordinary mirrors into statement pieces that reflect light and make rooms appear larger.
Rope wrapping creates texture and warmth around existing frames. Starting at one corner, we wind rope tightly around the frame perimeter, securing with hot glue every few inches. This technique works especially well with nautical or bohemian bedroom themes.
Paint techniques offer endless customization possibilities for our mirror projects. Vibrant colors create bold focal points, while distressed finishes add vintage charm. Using painters tape, we can create geometric patterns or color-blocked designs that complement our bedroom palette.
Embellishment options add unique character to our mirror frames. Mosaic tiles create colorful, artistic borders that catch and reflect light beautifully. Seashells bring coastal vibes, while small decorative stones add natural texture and earthy appeal.
Seasonal Decor and Color Scheme Updates
Seasonal updates refresh our bedroom aesthetics throughout the year without major renovations. Swapping key decorative elements adapts our space to seasonal moods and keeps our sanctuary feeling current.
Textile rotation provides the easiest seasonal transformation method. Changing pillow covers from warm, rich fabrics in winter to light, airy materials in summer instantly shifts our bedroom’s energy. Switching comforters and throws allows us to embrace seasonal color palettes effectively.
Color palette strategies guide our seasonal decorating decisions. Neutral and warm tones create cozy winter atmospheres, while cooler, vibrant hues bring summer freshness indoors. Choosing a base palette with seasonal accent colors ensures cohesive transitions throughout the year.
Layering techniques add depth and interest to our seasonal displays. Combining different textures through rugs, curtains, and bedding creates rich, inviting environments. Rotating wall art between seasons introduces new visual elements while maintaining our bedroom’s personal character.
Handcrafted updates make seasonal changes more meaningful and budget-friendly. Creating our own seasonal decorations using thrifted materials or natural elements keeps costs low. Supporting artisan-made pieces from platforms like Etsy adds unique, handcrafted touches that reflect our personal style preferences.
Conclusion
We’ve shown you that creating your dream bedroom doesn’t require very costly or hiring professionals. With these DIY bedroom ideas you can transform any space into a personalized sanctuary that reflects your unique style.
From custom headboards and handmade lighting fixtures to clever storage answers and decorative accents we’ve covered projects for every skill level. The key is starting small and building momentum as you gain confidence with each completed project.
Your bedroom should be a space where you feel completely at home. By incorporating these DIY techniques you’re not just saving money – you’re creating something truly yours. Whether you tackle one project at a time or jump into a complete makeover these ideas will help you create the perfect retreat you deserve.
Frequently Asked Questions
Can I transform my bedroom on a small budget?
Absolutely! DIY bedroom transformations don’t require large budgets. You can use affordable materials like plywood, repurposed wood, and fabric adhesives. Simple projects like painted accent walls, handmade storage boxes, and no-sew curtains can create significant impact without breaking the bank. Focus on small changes that reflect your personal style.
What are some beginner-friendly DIY bedroom projects?
Start with simple geometric painted accent walls, mason jar pendant lights, or floating shelves. Gallery walls using personal photos, throw pillow covers with fabric paint, and basic storage boxes are perfect for beginners. These projects require minimal tools and experience while making noticeable improvements to your space.
How can I add storage without taking up floor space?
Utilize vertical wall space with floating shelves and wall-mounted organizers. Create under-bed storage boxes with rolling systems, install bedside caddies, and use tiered trays for nightstands. Repurpose furniture like vintage dressers or old ladders to maximize storage while maintaining your bedroom’s aesthetic appeal.
What DIY lighting projects work best for bedrooms?
Mason jar pendant lights offer rustic charm, while string light canopies create enchanting overhead displays. Update existing bedside lamps with fresh designs and add modern features like USB charging ports. These lighting solutions enhance atmosphere while reflecting your personal style without requiring electrical expertise.
How can I create a custom headboard without professional help?
Choose from three main approaches: upholstered headboards using foam and fabric, rustic wood pallet constructions, or macrame and textile designs. Each method includes detailed instructions and material lists suitable for various skill levels. These projects allow complete customization to match your bedroom’s personality and style.
Are there renter-friendly bedroom DIY options?
Yes! Use removable wallpaper for temporary wall transformations, create gallery walls with damage-free hanging systems, and focus on furniture makeovers rather than permanent installations. String lights, portable storage solutions, and textile updates like curtains and throw pillows can personalize your space without violating lease agreements.
How do I plan a gallery wall layout effectively?
Use a paper template system to plan your layout before hanging anything. Cut paper templates matching your frame sizes and arrange them on the wall with painter’s tape. Maintain a cohesive color palette for frames and ensure consistent spacing. This method prevents wall damage and ensures professional-looking results.
What seasonal decor updates can I make easily?
Rotate textiles like throw pillows, curtains, and rugs to reflect seasonal color palettes. Switch out artwork and mirror decorations, update plant displays with seasonal varieties, and adjust lighting warmth. These handcrafted updates are budget-friendly and allow you to refresh your bedroom’s aesthetics throughout the year meaningfully.