We’ve all stared at those blank living room walls wondering how to transform them without very costly. The good news? You don’t need expensive artwork or professional designers to create stunning wall decor that reflects your personality and style.
DIY wall decor offers endless possibilities to breathe life into your living space while staying within budget. From simple canvas projects to innovative upcycling ideas we’ll explore creative answers that anyone can tackle regardless of skill level. These projects don’t just save money – they create unique pieces that can’t be found in any store.
Whether you’re working with a cozy apartment or spacious family room we’ll show you how to make a dramatic impact with materials you might already have at home. Get ready to discover wallet-friendly ways to turn your living room walls into captivating focal points that guests will admire and ask about.
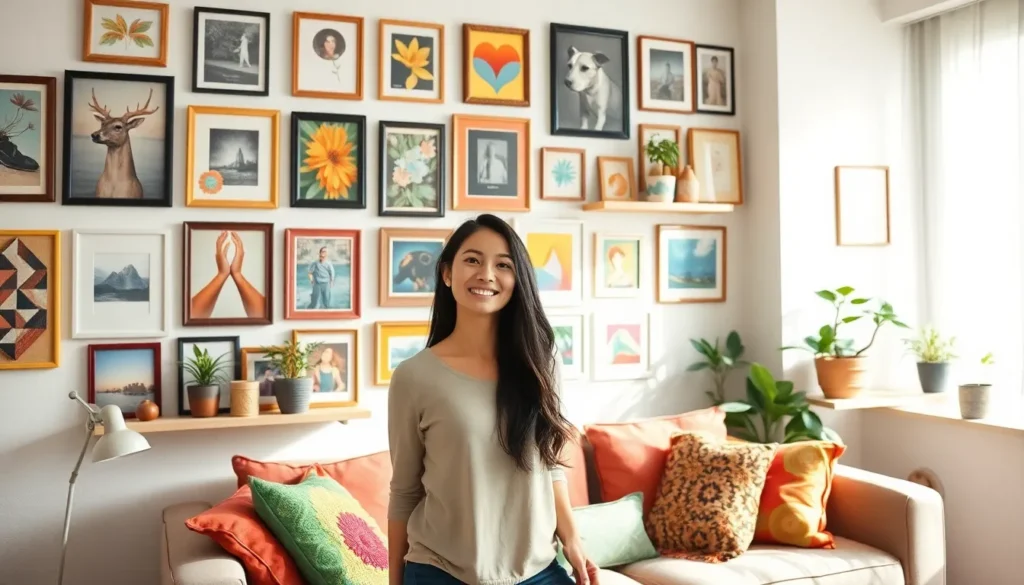
Create a Stunning Gallery Wall With Personal Photos and Artwork
Gallery walls offer one of the most impactful ways to transform your living room walls while showcasing your personal style and memories.
Choose a Cohesive Color Scheme for Your Gallery
Color coordination creates visual harmony across your entire gallery wall display. We recommend selecting 2-3 main colors that complement your living room’s existing palette. Neutral tones like black, white, and cream work beautifully with colorful artwork, while bold color schemes featuring navy, gold, and blush create dramatic focal points.
Matting provides an excellent opportunity to unify different pieces. White or cream mats instantly create cohesion between various photo styles and artwork types. Consider using the same mat color throughout your gallery even when frame colors vary.
Analyze your existing decor colors before finalizing your gallery palette. Pull accent colors from your throw pillows, rugs, or furniture to ensure your wall art enhances rather than clashes with your space. This approach creates a professionally designed look that ties your entire living room together.
Mix Different Frame Sizes and Styles
Frame variety adds visual interest and prevents your gallery wall from looking monotonous. We suggest combining 3-5 different frame sizes, such as 8×10, 11×14, and 16×20 inch frames. This size variation creates ever-changing movement that draws the eye across your display.
Style mixing works best when you maintain some consistent elements. Combine modern thin frames with vintage ornate pieces, but keep your color scheme or mat choices uniform. Wooden frames pair beautifully with metal ones when they share similar tones.
Balance becomes crucial when working with different frame styles. Place your largest pieces first as anchor points, then fill in with medium and small frames. Avoid clustering all similar sizes in one area, which creates visual weight imbalances.
Plan Your Layout Before Hanging
Paper templates save time and prevent unnecessary wall holes. Cut paper pieces matching each frame’s dimensions and tape them to your wall. This method lets you experiment with arrangements until you find the perfect layout.
Measure and mark your center point before starting your arrangement. Most gallery walls work best when centered around eye level, approximately 57-60 inches from the floor to the center of your display. Use a level and pencil to mark reference points.
Photography helps you evaluate your layout from different angles. Take pictures of your paper template arrangement and review them on your phone. This perspective often reveals spacing issues or balance problems you might miss when standing close to the wall.
Build Floating Shelves for Decorative Display Storage

Floating shelves combine functionality with style to create an elegant wall decor solution that maximizes your living room’s visual appeal. We’ll guide you through selecting materials, proper installation techniques, and styling strategies that transform empty walls into stunning display areas.
Select the Right Wood Type for Your Living Room Style
Wood selection directly impacts how well your floating shelves integrate with your existing decor theme. Pine offers an affordable option that works beautifully in farmhouse and rustic living rooms, while oak provides durability and classic grain patterns perfect for traditional spaces. Walnut brings rich, dark tones that complement modern and contemporary designs with its sophisticated appearance.
Consider your room’s color palette when choosing wood finishes. Light woods like maple and birch brighten spaces with neutral or cool color schemes, while darker options such as cherry and mahogany add warmth to rooms with earth tones. We recommend measuring your wall space first to determine the optimal shelf length, typically ranging from 24 to 48 inches for most living room applications.
Budget considerations play a crucial role in wood selection. Softwoods like pine cost significantly less than hardwoods, making them ideal for beginners or those working with limited budgets. But, hardwoods offer superior durability and can support heavier decorative items without sagging over time.
Install Shelves at Eye Level for Maximum Impact
Eye level installation ensures your floating shelves become focal points rather than overlooked accessories. We position shelves between 57 and 65 inches from the floor, which aligns with the average person’s natural sight line when standing. This height creates optimal viewing angles for displayed items while maintaining comfortable access for rearranging decor.
Wall stud location determines the strongest mounting points for your shelves. Use a stud finder to locate at least two studs for shelves longer than 24 inches, ensuring your installation can support decorative objects weighing up to 15 pounds per bracket. Mark stud locations with pencil before drilling to maintain accuracy during installation.
Level installation prevents items from sliding and creates a professional appearance. We use a 24 inch level to ensure brackets align perfectly, checking measurements twice before drilling pilot holes. Hidden bracket systems provide the cleanest look by concealing mounting hardware completely within the shelf structure.
Safety considerations include checking for electrical wires and plumbing behind walls before drilling. We recommend using a wall scanner to identify potential hazards, especially in older homes where wiring may not follow standard placement patterns.
Style Shelves With Books, Plants, and Decorative Objects
Strategic styling transforms functional shelves into curated displays that enhance your living room’s aesthetic appeal. We follow the rule of threes by grouping decorative objects in odd numbers, which creates visual balance and prevents cluttered appearances. Books serve as both functional storage and decorative elements when arranged with spines facing outward to display colorful covers.
Plant selection adds natural elements that soften hard shelf edges. Pothos, snake plants, and succulents thrive in typical living room lighting conditions while requiring minimal maintenance. We recommend using decorative planters that complement your room’s color scheme, positioning plants at varying heights to create ever-changing visual interest.
Decorative objects should reflect your personal style while maintaining cohesive color themes. Picture frames, candles, small sculptures, and ceramic pieces work well when displayed with adequate spacing between items. We suggest leaving 2 to 3 inches between objects to prevent overcrowding and allow each piece to make its visual impact.
Layering techniques create depth and sophistication in shelf displays. Position larger items toward the back, medium sized pieces in the middle, and smaller accent objects in front. This arrangement adds dimension while ensuring all items remain visible and accessible for dusting and rearrangement.
Design Custom Wall Art Using Canvas and Paint

Canvas painting offers endless possibilities for creating personalized wall decor that perfectly matches your living room’s aesthetic. We’ll explore three distinct approaches to transform blank canvases into stunning focal points.
Create Abstract Geometric Patterns
Geometric designs add visual interest and can match any room style with their clean lines and bold shapes. Start by selecting colors that complement your existing decor palette, then use painter’s tape to create sharp, defined edges for triangles, squares, and hexagons.
Paint alternating sections with different colors to create ever-changing contrast and movement across your canvas. Layer geometric shapes of varying sizes to build depth and complexity in your design. Use metallic paints like gold or silver to add luxury touches that catch light throughout the day.
Bold color combinations work particularly well for modern living rooms, while muted tones create sophisticated pieces for traditional spaces. Consider creating a series of three geometric paintings to display as a cohesive collection above your sofa or fireplace.
Paint Inspirational Quotes or Typography
Typography art brings personality and meaning to your living room walls while serving as daily motivation. Choose quotes that resonate with your family’s values or reflect the atmosphere you want to create in your space.
Use stencils for clean, professional lettering if you’re not confident in your freehand skills. Select fonts that complement your room’s style – script fonts work beautifully in farmhouse or vintage themed rooms, while bold sans serif fonts suit contemporary spaces.
Layer your text over subtle background colors or textures to add visual depth without overwhelming the message. Consider painting quotes in languages that hold special meaning for your family, or incorporate meaningful dates and names alongside inspirational phrases.
Make Textured Art With Different Painting Techniques
Textured painting techniques create dimensional artwork that adds sophisticated visual interest to any living room. Experiment with dripping, splashing, and layering methods to achieve unique effects that can’t be replicated with traditional brush strokes.
Use palette knives to create thick, sculptural paint applications that catch light and create shadows throughout the day. Build up layers of paint in different colors, then scrape or scratch through the top layers to reveal the colors beneath.
Try the impasto technique by applying paint thickly with brushes or palette knives to create raised, three dimensional surfaces. Mix sand or modeling paste with your acrylic paint to create additional texture and depth that transforms your canvas into a tactile art piece.
Combine multiple techniques on a single canvas to create complex, gallery worthy pieces that serve as conversation starters in your living room.
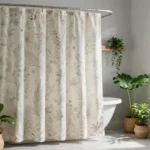
Install Removable Wallpaper or Wall Decals for Instant Impact

Removable wallpaper and wall decals offer the quickest transformation for any living room wall without requiring permanent changes. These versatile options come in countless colors, patterns, and sizes to suit every decorating style imaginable.
Choose Patterns That Complement Your Existing Decor
Selecting wallpaper or decal patterns that coordinate with your current furniture creates a cohesive look throughout the space. Abstract designs work beautifully with modern sofas and minimalist coffee tables, while botanical prints enhance rooms filled with natural textures and earth tones. Geometric shapes add visual interest to contemporary spaces without overwhelming existing artwork or decorative accessories.
We recommend pulling colors directly from your throw pillows, curtains, or area rugs when choosing patterns. This approach ensures your new wall treatment feels intentional rather than disconnected from the room’s overall aesthetic.
Apply Peel-and-Stick Options for Renters
Peel-and-stick wallpaper provides renters with the perfect solution for personalizing their living space without violating lease agreements. These products don’t require permanent adhesives that damage walls and can be removed cleanly without leaving residue behind. Most peel-and-stick options can be repositioned during application, giving you flexibility if you need to adjust placement.
We’ve found that peel-and-stick wall decals offer even more versatility for renters who want smaller design changes. They’re available in everything from small botanical motifs to large-scale murals, allowing you to customize your impact level based on your comfort with temporary modifications.
Create Accent Walls Behind Sofas or Entertainment Centers
Accent walls serve as focal points that draw attention to your living room’s main seating area or entertainment center. Placing removable wallpaper behind your sofa creates depth and visual weight that makes the entire seating arrangement feel more intentional and designed.
Entertainment centers benefit from bold patterns or textured wallpaper that frames your television and media components. We suggest choosing designs with subtle movement or organic shapes that won’t compete with screen content when you’re watching movies or shows.
Large-scale wall decals work particularly well in these accent wall applications, especially when you want dramatic impact without covering the entire wall surface.
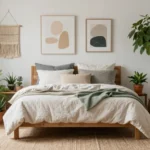
Craft Macrame Wall Hangings for Bohemian Charm

We’ll create stunning macrame wall hangings that perfectly complement your living room’s bohemian aesthetic. This timeless create technique adds texture and warmth to any space while showcasing your personal style.
Learn Basic Macrame Knots and Techniques
Start your macrame journey by mastering the lark’s head knot, which forms the foundation for most wall hanging projects. This essential knot attaches your cord to the mounting dowel or branch and creates a secure starting point for your design.
Square knots create the body of your macrame piece and provide structure to your hanging. We’ll use these knots to form geometric patterns and create visual weight in the center of your artwork.
Wrapped knots add finishing touches and secure loose ends throughout your design. These knots help transition between different sections of your wall hanging and create clean, professional looking results.
Practice these three fundamental techniques on small test pieces before starting your main project. This approach builds confidence and ensures consistent tension throughout your macrame creation.
Select Natural Fiber Cords in Neutral Tones
Choose cotton rope for beginners because it’s forgiving and easy to work with during the learning process. Cotton fibers also fray beautifully at the ends, creating the signature bohemian texture that makes macrame wall hangings so appealing.
Jute cord offers a more rustic appearance and works perfectly for farmhouse or natural living room styles. This natural fiber holds knots securely and develops character over time as it ages.
Neutral tones like cream, beige, and natural white complement existing furniture without overwhelming your space. These colors blend seamlessly with both light and dark wall colors while maintaining the organic feel of macrame art.
Consider the thickness of your cord based on your wall hanging size and desired visual impact. Thicker cords create bold, statement pieces while thinner cords produce delicate, intricate designs.
Vary Sizes and Patterns for Visual Interest
Create a ever-changing wall display by crafting multiple macrame pieces in different sizes and hanging them as a group. Small pieces work well flanking larger artwork, while medium sized hangings make perfect standalone focal points.
Experiment with various knotting patterns to avoid monotonous designs and add personality to each piece. Combine dense square knot sections with loose, flowing areas to create rhythm and movement in your macrame art.
Alternate between geometric patterns and organic flowing shapes to keep your wall arrangement visually captivating. This contrast creates depth and prevents your macrame collection from appearing flat or uniform.
Mix different cord lengths within a single piece to create cascading effects that draw the eye downward. These varying lengths add dimension and prevent your wall hanging from looking too structured or rigid.
Repurpose Vintage Items Into Unique Wall Decorations

Vintage items offer incredible potential for creating one-of-a-kind wall decorations that tell stories while adding character to our living spaces. We can transform forgotten treasures into stunning focal points that reflect our personal style and appreciation for timeless design.
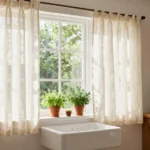
Transform Old Windows Into Decorative Frames
Old windows make extraordinary frames for photographs, artwork, or even mirrors. We can collect weathered window panes from antique stores, salvage yards, or estate sales to create authentic vintage charm. The original glass can be replaced with our favorite family photos, botanical prints, or artwork that complements our living room’s color scheme.
Adding decorative elements like ribbons, dried flowers, or small LED string lights around the window frame edges creates a personalized touch. We should clean the windows thoroughly and sand any rough edges before installation to ensure safety and longevity. Multiple windows can be arranged in a gallery wall formation for maximum impact.
Convert Vintage Plates Into Wall Art Displays
Vintage plates transform into elegant wall art displays that showcase our appreciation for classic design and craftsmanship. We can arrange mismatched vintage plates in circular or linear patterns to create stunning visual compositions. Different sizes and patterns work together beautifully when unified by a common color palette or theme.
Creating a mosaic or collage using vintage plates on a large piece of plywood or canvas adds sophistication and historical charm to our living room walls. We should use appropriate mounting hardware designed for the weight of ceramic pieces to ensure secure installation. Mixing plates with different textures, colors, and patterns creates depth while maintaining visual cohesion.
Use Antique Mirrors to Add Light and Dimension
Antique mirrors serve a dual purpose by adding both decorative appeal and functional lighting enhancement to our living spaces. We can arrange multiple mirrors of varying sizes in artistic patterns to create dramatic wall installations that reflect natural light throughout the room. This technique makes smaller living rooms appear more spacious and brighter.
Creating mirror collages using ornate vintage frames adds architectural interest and vintage elegance to plain walls. We should position mirrors strategically to reflect views of plants, artwork, or windows to maximize their visual impact. The patina and character of aged mirror glass creates unique reflective qualities that modern mirrors simply cannot replicate.
Create Three-Dimensional Wall Sculptures and Installations

Three-dimensional wall art transforms flat surfaces into ever-changing focal points that captivate viewers from multiple angles. We’ll explore materials like wood, fabric, paper, and metal wire to create layered pieces that add depth and visual interest to your living room walls.
Build Wooden Geometric Wall Art
Wooden geometric patterns offer a modern yet timeless approach to three-dimensional wall decor. We recommend starting with reclaimed wood planks or purchasing small wooden pieces from your local create store. Triangular arrangements create ever-changing movement across your wall, while hexagonal patterns provide a more structured, honeycomb-like appearance.
Painting each geometric piece in different colors allows you to match your existing living room palette perfectly. Consider using two to three complementary colors that already exist in your space for a cohesive look. Sand each wooden piece lightly before painting to ensure proper paint adhesion, and apply a primer coat for the best results.
Assembly becomes easier when you create a paper template first. Cut out paper shapes matching your wooden pieces and arrange them on the wall until you find the perfect configuration. Mark the positions lightly with pencil, then mount each wooden piece using appropriate wall anchors based on your wall type.
Make Paper Flower Wall Installations
Paper flowers bring elegance and whimsy to any living room without the maintenance requirements of real blooms. We suggest using high-quality colored paper or cardstock in shades that complement your existing decor scheme. Crepe paper works exceptionally well for realistic petal textures, while regular construction paper offers bold, vibrant colors.
Creating realistic flower shapes requires layering multiple petal pieces of varying sizes. Start with larger outer petals and work inward with progressively smaller pieces. Gently curve each petal using a pencil or your fingers to add natural dimension. Consider making roses, peonies, or cherry blossoms depending on your style preference.
Arranging your paper flowers in a cascading pattern creates visual flow across your wall. We recommend grouping flowers in odd numbers like three, five, or seven for the most pleasing aesthetic. Mount each flower using small nails or adhesive strips, varying the heights to create depth and movement.
Design Metal Wire Art Pieces
Metal wire art introduces sleek, contemporary elements that catch and reflect light beautifully throughout your living room. We suggest starting with malleable materials like aluminum create wire or copper wire, which bend easily without special tools. Gauge thickness between 12 and 16 works well for most sculptural projects while maintaining structural integrity.
Abstract designs offer the most creative freedom for beginners. Create flowing curves, spirals, or interconnected geometric shapes that complement your room’s aesthetic. Wire can also frame existing decorative items like mirrors or artwork, adding an industrial edge to traditional pieces.
Mounting wire art requires careful consideration of weight distribution. Use small eye screws or wall anchors appropriate for your wall type, and ensure each piece is securely fastened. Consider backlighting some wire pieces with LED strips to create dramatic shadows and enhance the three-dimensional effect during evening hours.
Incorporate Living Elements With Vertical Garden Walls

Bringing nature indoors transforms our living spaces into vibrant, refreshing environments that promote well-being and style. Living walls create ever-changing focal points that evolve with the seasons while purifying our indoor air naturally.
Install Wall-Mounted Planters for Succulents
Wall-mounted planters offer a modern solution for displaying succulents in our living rooms without taking up floor space. These versatile containers come in various materials like ceramic, metal, or wood, allowing us to match our existing decor perfectly.
Succulents thrive in wall-mounted displays because they require minimal water and adapt well to indoor lighting conditions. We can choose from popular varieties like jade plants, echeveria, or string of pearls to create interesting textures and colors on our walls.
Arranging multiple planters in geometric patterns creates visual impact while maintaining the clean lines that complement contemporary living spaces. Spacing planters 12-18 inches apart ensures each plant receives adequate light and air circulation for healthy growth.
Installing these planters requires basic wall anchors and screws, making this project accessible for most DIY skill levels. We should always check our wall type and use appropriate mounting hardware to support the weight of soil and plants safely.
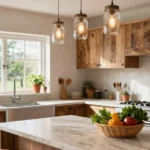
Create Herb Gardens for Kitchen-Adjacent Living Rooms
Herb gardens on living room walls provide fresh ingredients for cooking while adding aromatic greenery to our spaces. Popular herbs like basil, rosemary, thyme, and mint grow well indoors with proper lighting and care.
Installing a modular planter system allows us to customize our herb wall according to available space and lighting conditions. These systems typically feature individual pockets or containers that can be arranged in various configurations to suit our room layout.
Growing herbs indoors requires consistent watering and adequate light exposure, making south-facing walls ideal for herb garden installations. We can supplement natural light with LED grow lights if our chosen wall receives limited sunlight throughout the day.
Harvesting fresh herbs from our living room wall creates a unique cooking experience while maintaining the garden’s decorative appeal. Regular pruning encourages continued growth and keeps our herb wall looking lush and healthy.
Use Air Plants for Low-Maintenance Green Walls
Air plants offer the ultimate low-maintenance solution for creating living walls in our homes since they absorb moisture and nutrients from the air. These fascinating plants eliminate the need for soil, making them perfect for renters or those seeking minimal upkeep options.
Attaching air plants to walls using wire mesh, cork boards, or decorative mounting systems creates stunning displays with minimal effort. We can arrange them in clusters or scatter them across larger wall areas to achieve different visual effects.
Caring for air plants requires only weekly misting and occasional soaking, making them ideal for busy lifestyles or frequent travelers. Different varieties like Spanish moss, tillandsia, or ionantha provide various textures and colors to enhance our wall displays.
Creating patterns with air plants using geometric wire frames or natural wood branches adds artistic flair to our living walls. These mounting materials become part of the overall design, contributing to the aesthetic appeal while supporting our air plant collection.
Design Statement Walls With Stenciled Patterns

Stenciling transforms ordinary living room walls into stunning focal points that reflect your personal style. We’ll guide you through creating professional-looking patterned walls using simple techniques and affordable materials.
Choose Stencil Designs That Match Your Living Room Theme
Modern living rooms benefit from geometric patterns like hexagons, triangles, or clean-lined moroccan designs that complement contemporary furniture. Traditional spaces shine with classic damask, floral motifs, or elegant paisley patterns that echo timeless decorating styles. Rustic and farmhouse themes pair beautifully with bee trellis stencils, botanical designs, or simple stripe patterns that enhance the natural aesthetic.
Scale plays a crucial role in stencil selection, as larger patterns work best on spacious accent walls while smaller designs suit intimate seating areas. We recommend choosing stencils with 6-12 inch repeats for most living room applications. Natural themes incorporate leaf patterns, tree branches, or organic shapes that bring outdoor elements inside your space.
Select Paint Colors That Create Contrast
High contrast combinations like charcoal gray stencils on white walls create dramatic statement pieces that anchor your living room design. Subtle contrasts using tones within the same color family, such as sage green on cream backgrounds, provide sophisticated texture without overwhelming existing decor. We suggest testing contrast levels by holding paint samples against your wall color in different lighting conditions.
Metallic paints in gold, silver, or copper add luxurious dimension to stenciled patterns and reflect light beautifully throughout the day. Two-tone approaches using your wall’s existing color plus one accent shade create cohesive designs that integrate seamlessly with current color schemes. Dark stencils on light backgrounds typically provide the strongest visual impact for dramatic accent walls.
Practice Stenciling Techniques on Sample Material First
Cardboard pieces or poster board allow you to perfect your technique before touching your living room walls. We recommend practicing brush loading, stencil positioning, and paint application pressure to achieve consistent results. Test different tools including foam rollers, stencil brushes, and makeup sponges to discover which creates your preferred texture and coverage.
Sample materials help you determine optimal paint consistency, as too-thin paint bleeds under stencil edges while too-thick paint creates uneven coverage. Practice removing stencils at the right moment when paint is slightly tacky but not wet to prevent smudging. Multiple practice rounds on sample boards build muscle memory for steady hand movements and consistent pattern spacing that’ll translate to flawless wall application.
Build Custom Picture Ledges for Rotating Art Displays

Picture ledges offer the perfect solution for displaying artwork without committing to permanent arrangements. These versatile shelves let us change our wall displays whenever inspiration strikes.
Construct Simple Wooden Ledges With Basic Tools
Building wooden ledges requires only a few essential tools and materials. We’ll need a saw for cutting wood to size, a drill for making pilot holes, and screws for secure mounting. Pine boards work excellently for budget-friendly projects, while oak or maple provide more durability for heavier artwork displays.
Measuring our wall space accurately ensures proper ledge placement and prevents installation mistakes. We recommend cutting ledges between 24-36 inches long for optimal visual balance in most living rooms. Creating a shallow groove along the top edge helps prevent artwork from sliding off the ledge.
Safety becomes paramount when using power tools, so we always wear protective eyewear and work in well-ventilated areas. Pre-drilling screw holes prevents wood splitting and ensures clean, professional-looking results. Most wooden picture ledges can support 10-15 pounds when properly installed into wall studs.
Paint or Stain Ledges to Match Your Wall Color
Painting ledges to match wall colors creates a seamless, built-in appearance that enhances our room’s cohesive design. We suggest using the same paint finish as our walls, whether that’s eggshell, satin, or semi-gloss, for perfect color matching. Primer application ensures even paint coverage and prevents wood grain from showing through light colors.
Staining offers an alternative approach that highlights natural wood grain while complementing our existing decor. Light stains like honey oak work beautifully with neutral wall colors, while darker walnut stains create dramatic contrast against lighter backgrounds. Applying two thin coats produces more even results than one thick application.
Testing our chosen finish on a small wood scrap helps us preview the final appearance before committing to the entire project. We recommend allowing 24 hours between coats for optimal adhesion and durability. Polyurethane topcoats protect painted or stained surfaces from everyday wear and moisture.
Style Ledges With Layered Artwork and Decorative Items
Layering creates visual depth and interest that makes our picture ledge displays more captivating. We start by placing larger pieces toward the back, then add smaller frames and decorative objects in front for dimensional appeal. Mixing frame sizes and orientations prevents our displays from looking too uniform or predictable.
Books serve as excellent styling props that add height variation and support artwork at different angles. We often lean smaller frames against books or decorative objects to create ever-changing, casual arrangements. Small plants, candles, or sculptural pieces fill gaps and add personality to our ledge displays.
Balancing colors and textures throughout our ledge arrangement creates harmony while maintaining visual interest. We typically choose 2-3 main colors that appear in our room’s existing palette, then distribute these hues across our display items. Rotating seasonal decorations keeps our wall displays fresh and prevents them from becoming stagnant focal points.
Conclusion
We’ve shown you that transforming your living room walls doesn’t require a massive budget or professional skills. From gallery walls that tell your story to floating shelves that blend function with style these DIY projects let you create spaces that truly reflect who you are.
The beauty of DIY wall decor lies in its flexibility. Whether you’re drawn to the natural textures of macrame the clean lines of geometric art or the living beauty of vertical gardens you can mix and match these ideas to suit your unique taste and lifestyle.
Remember that the best wall decor grows with you over time. Picture ledges let you rotate seasonal displays while removable wallpaper gives you freedom to experiment without commitment. Start with one project that excites you most and build from there.
Your living room walls are waiting to become the backdrop for memories laughter and the life you’re building. With these ideas in hand you’re ready to turn those blank spaces into something extraordinary.
Frequently Asked Questions
What are the benefits of DIY wall decor over store-bought options?
DIY wall decor allows you to create unique pieces that reflect your personal style and personality while staying within budget. You can use materials you already have at home, customize colors and designs to match your existing decor perfectly, and create one-of-a-kind artwork that can’t be found in stores. Plus, it’s a fun creative outlet that gives you complete control over the final result.
How do I create a cohesive gallery wall without it looking cluttered?
Choose 2-3 main colors that complement your existing decor and stick to this color scheme throughout your gallery wall. Use consistent matting to unify different pieces, and mix frame sizes while maintaining some consistent elements like similar frame styles or colors. Plan your layout using paper templates before hanging, and ensure the display is centered at eye level for the best visual impact.
What type of wood should I use for DIY floating shelves?
The wood type depends on your living room style and budget. Pine is affordable and perfect for rustic or farmhouse themes, while walnut offers elegance for modern designs. Oak provides durability for heavy items, and reclaimed wood adds character and sustainability. Consider your decor style, weight requirements, and budget when making your selection.
Can I use removable wallpaper if I’m renting my home?
Yes, removable wallpaper is perfect for renters! Peel-and-stick options can be easily removed without damaging walls or losing your security deposit. Choose patterns that complement your existing decor, and consider creating an accent wall behind your sofa or entertainment center for maximum impact without overwhelming the space.
What basic macrame knots do I need to know for wall hangings?
You only need three essential knots: the lark’s head knot for attaching cords, square knots for creating patterns and structure, and wrapped knots for finishing touches. These fundamental techniques will allow you to create beautiful macrame wall hangings. Start with natural fiber cords like cotton or jute in neutral tones to complement most decor styles.
How can I repurpose vintage items into wall decor?
Transform old windows into decorative frames for photos or artwork, arrange vintage plates into elegant wall art displays, and use antique mirrors to enhance light and create spaciousness. Look for items at thrift stores, estate sales, or your own attic. Clean and restore pieces as needed, then arrange them thoughtfully to create unique focal points.
What materials work best for three-dimensional wall sculptures?
Wood, fabric, paper, and metal wire are excellent materials for 3D wall art. Reclaimed wood is perfect for geometric designs, paper works well for flower installations with layered petals, and metal wire allows for abstract sculptural pieces. Choose materials that complement your existing decor and ensure proper mounting for safety and stability.
How do I maintain a living wall in my living room?
Choose low-maintenance plants like succulents or air plants that require minimal watering. Install proper drainage systems for wall-mounted planters, ensure adequate lighting (natural or grow lights), and select plants suited to your room’s humidity and temperature. Air plants are particularly easy, requiring only weekly misting and good air circulation.
What’s the key to successful stenciling on walls?
Practice on sample materials first to perfect your technique. Choose stencil designs that match your room’s scale and style, use high-contrast paint combinations for dramatic effects, and ensure your stencil is properly secured to prevent paint bleeding. Work with small amounts of paint and use a dabbing motion rather than brushing for clean, professional-looking results.
How do I style picture ledges for the best visual impact?
Layer artwork and decorative items at varying heights and depths to create visual interest. Group items in odd numbers (especially threes) for better balance, and mix different sizes and textures. Paint or stain ledges to match your wall color for a cohesive look, and rotate displays regularly to keep your decor fresh and dynamic.