Transforming your living room doesn’t have to drain your bank account or require a complete furniture overhaul. We’ve discovered that creating stunning custom pieces through DIY projects can save you thousands while giving your space a unique personality that store-bought furniture simply can’t match.
The beauty of DIY living room furniture lies in its endless customization possibilities. Whether you’re working with reclaimed wood pallets or repurposing existing pieces you already own we’ll show you how to create everything from coffee tables to entertainment centers that perfectly fit your space and style preferences.
Ready to roll up your sleeves and create furniture that’s both functional and Instagram-worthy? We’ve compiled the most effective DIY living room furniture ideas that deliver maximum impact with minimal investment. These projects range from beginner-friendly weekend builds to more advanced creations that’ll have your guests asking where you bought such amazing pieces.
Build Your Own Coffee Table From Reclaimed Wood
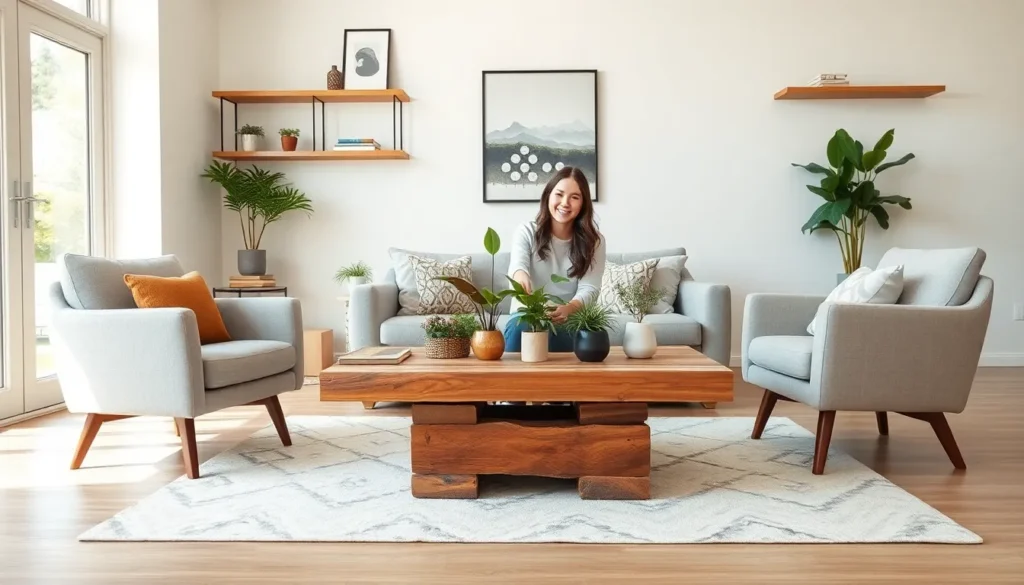
Reclaimed wood coffee tables bring rustic charm and environmental consciousness together in one stunning centerpiece. We’ll guide you through creating this beautiful DIY living room furniture piece that showcases natural character while saving you hundreds of dollars.
Choosing the Right Reclaimed Materials
Select weathered barn wood or old fence planks for authentic texture and unique grain patterns. We recommend checking local salvage yards, demolition sites, or online marketplaces like Facebook Marketplace where reclaimed lumber typically costs $3-8 per square foot compared to $15-25 for new hardwood.
Inspect each piece thoroughly for structural integrity before purchasing. Look for boards that are 1.5-2 inches thick and free from rot, excessive warping, or metal hardware that could damage your tools. Pine, oak, and cedar work exceptionally well for coffee table construction.
Measure your living room space to determine ideal coffee table dimensions. Standard coffee tables range from 36-48 inches long and 16-20 inches wide, sitting 16-18 inches high. We suggest buying 20% more material than calculated to account for unusable sections and cutting mistakes.
Essential Tools and Hardware Needed
Gather power tools including a circular saw, drill driver, orbital sander, and router for professional results. We use a miter saw for precise cuts and a pocket hole jig for hidden joinery that creates clean, strong connections.
Purchase quality hardware such as wood screws (2.5-3 inches), pocket hole screws, wood glue, and furniture pads. You’ll need 120 and 220 grit sandpaper, wood stain or finish, and protective equipment including safety glasses and dust masks.
Invest in measuring tools like a tape measure, speed square, and pencil for accurate marking. We recommend having clamps available for assembly, with at least four 24-inch bar clamps and several smaller spring clamps for detailed work.
Step-by-Step Assembly Process
Start by cleaning and preparing your reclaimed wood pieces using the orbital sander with 120 grit paper. Remove old nails, screws, or paint while preserving the weathered character that makes reclaimed wood special. Sand progressively to 220 grit for smooth surfaces.
Cut your tabletop planks to identical lengths using the miter saw, typically 42-48 inches for most living rooms. We arrange boards with alternating grain patterns to prevent warping and create visual interest. Edge glue the planks together using wood glue and clamps, allowing 24 hours to cure completely.
Build the table base using mortise and tenon joints or pocket screws for durability. Cut four legs to 15 inches (accounting for 1.5-inch tabletop thickness) and create aprons connecting the legs. We space legs 24-30 inches apart lengthwise and 12-16 inches apart widthwise for stability.
Attach the tabletop to the base using figure-8 fasteners or pocket screws from underneath. These connections allow for wood movement while maintaining structural integrity. Apply your chosen finish whether it’s clear polyurethane for protection or stain followed by topcoat for color enhancement.
Create Custom Storage Ottomans With Hidden Compartments

We’ll explore how to build functional storage ottomans that serve double duty as seating and hidden storage answers for your living room.
Selecting Foam and Fabric Materials
Choose high-density foam for the cushioning layer to ensure your ottoman maintains its shape over time. We recommend selecting foam that’s at least 2-3 inches thick for optimal comfort and durability when people sit on your custom ottoman.
Pick fabric materials that complement your existing living room decor while providing adequate strength for daily use. Cotton blends, canvas, or upholstery-grade fabrics work exceptionally well because they resist wear and maintain their appearance longer than lightweight materials.
Consider fabric patterns that hide minor imperfections or stains, especially if you’re new to upholstering projects. Darker colors or busy patterns make excellent choices for beginner DIY enthusiasts who want professional-looking results.
Building the Storage Frame
Construct the frame using wood or MDF panels to create a sturdy foundation that can support both storage items and people sitting on top. We suggest using 3/4-inch plywood or MDF for the sides and bottom, ensuring your ottoman can handle substantial weight without sagging.
Cut your materials to create a rectangular box with interior dimensions that accommodate your storage needs. Standard ottoman dimensions range from 15×15 inches for smaller spaces to 24×18 inches for larger living rooms with more storage requirements.
Install hinges and latches on one side of the frame to create the hidden compartment mechanism. We recommend using soft-close hinges that prevent the lid from slamming shut and provide smooth operation when accessing your stored items.
Sand all surfaces thoroughly before assembly to eliminate rough edges that might snag fabric during the upholstering process. This preparation step ensures your finished ottoman looks professional and prevents premature wear on your chosen fabric materials.
Upholstering Techniques for Beginners
Wrap the foam around your wooden frame, securing it temporarily with clips while you prepare the fabric covering. We find that batting or thin foam padding between the main cushioning and fabric creates a smoother, more professional appearance.
Cut your fabric with approximately 4-6 inches of extra material on all sides to allow for proper wrapping and securing around the frame edges. This extra fabric ensures you have enough material to create tight, wrinkle-free corners that look professionally finished.
Attach the fabric using a staple gun or heavy-duty adhesive, starting with opposite sides to maintain even tension across the surface. We recommend pulling the fabric taut but not overstretching it, which can cause distortion or premature tearing at stress points.
Create neat corners by folding the fabric like wrapping a present, tucking excess material under and securing with staples placed close together. This technique eliminates bulk and creates clean lines that enhance your ottoman’s overall appearance in your living room space.
Design Floating Shelves for Maximum Wall Storage

Building on our custom furniture theme, floating shelves offer the perfect solution for maximizing vertical storage while maintaining that clean, modern aesthetic we’re creating throughout our living room.
Measuring and Planning Your Wall Layout
Start by assessing your wall space thoroughly. We’ll need to measure the height, width, and identify any obstructions like outlets or vents that might affect our shelf placement. Standard floating shelf depths range from 10–14 inches, which accommodates most living room essentials like books, decorative items, plants, and small electronics.
Plan your shelf spacing strategically. We recommend positioning shelves 12–18 inches apart for optimal versatility and visual appeal. Lower shelves work best for heavier items like books or storage baskets, while higher shelves are perfect for lighter decorative pieces and plants.
Gather your essential measuring tools including a tape measure, level, pencil, and stud finder. These tools ensure our shelves will be perfectly aligned and securely mounted.
Installing Hidden Bracket Systems
Locate wall studs using your stud finder first. We’ll mark drilling points directly on the wall where studs are positioned, as this provides the strongest foundation for our floating shelves. Heavy-duty mounting requires hitting at least two studs for each shelf.
Install the hidden brackets by drilling pilot holes into the marked stud locations. We’ll attach the brackets with heavy-duty screws, ensuring they’re perfectly level using our level tool. This step is crucial for achieving that seamless floating appearance.
Secure the shelves by sliding the pre-drilled shelf onto the installed brackets. For added stability, we can add additional screws through the back of the shelf into the bracket system. This dual-mounting approach handles heavier loads safely.
Styling Your DIY Shelves
Create functional arrangements by grouping items strategically. We’ll organize books, photos, plants, and decorative objects by color, height, or function to create visual cohesion across our floating shelf display.
Balance proportions by alternating between stacked items and spaced-out objects. This technique creates visual interest and prevents our shelves from looking cluttered or overwhelming in the room.
Maintain your shelves with regular dusting to keep them looking neat and organized. We can also customize the finish by painting or staining the wood to match our existing decor, creating a cohesive look throughout our living room space.
Construct a Rustic TV Stand From Pallets
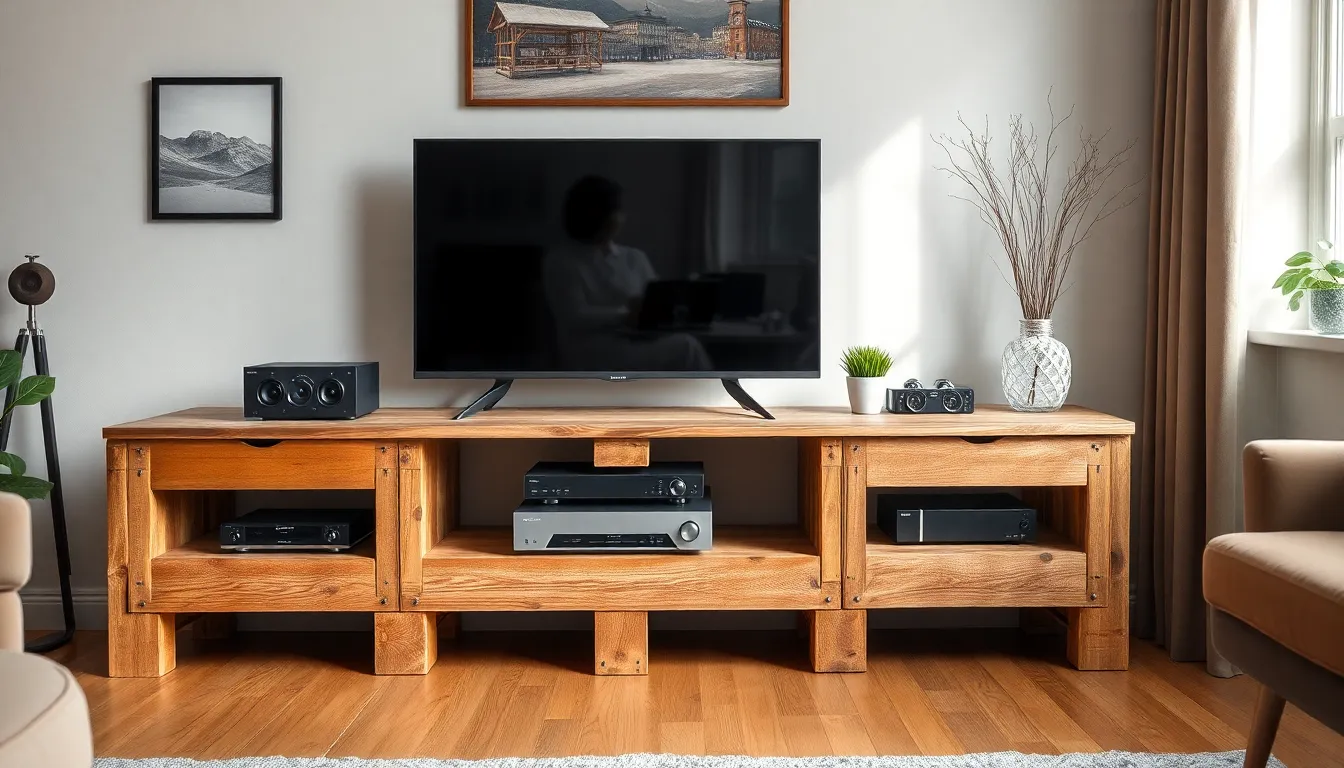
We’ll create an affordable and stylish TV stand using reclaimed pallets that perfectly complements your DIY living room aesthetic. This project transforms discarded shipping materials into functional furniture while adding rustic charm to your entertainment area.
Preparing and Sanding Pallet Wood
Disassembling the pallet marks our first crucial step in this transformation process. We recommend drilling through nail heads and then pulling the boards apart to preserve the wood’s integrity. Once we’ve separated each board, sanding becomes essential for achieving a smooth surface that’s safe to handle and visually appealing.
Removing dirt and debris requires thorough attention during the sanding process. We should start with coarse-grit sandpaper to eliminate rough spots and splinters, then progress to finer grits for a polished finish. Safety equipment including dust masks and eye protection prevents inhalation of wood particles during this preparation phase.
Inspecting each board for structural integrity ensures our TV stand will support electronic equipment reliably. We need to identify and replace any boards with cracks, rot, or excessive wear that could compromise the stand’s stability.
Assembly and Reinforcement Methods
Stacking boards or arranging them as shelves creates the basic structure for our pallet TV stand. We can reassemble the original pallet configuration or design a custom layout that accommodates exact entertainment equipment dimensions. Strategic placement of boards determines both the stand’s functionality and visual appeal.
Securing boards together using screws provides superior stability compared to the original nail construction. We should choose wood screws that penetrate at least one inch into the receiving board for maximum holding power. Pre-drilling holes prevents wood splitting and ensures clean, professional-looking joints.
Adding wooden supports reinforces areas that will bear important weight from televisions and electronic components. We recommend installing cross-braces between vertical supports and corner brackets where horizontal shelves meet vertical elements. These reinforcement methods distribute weight evenly and prevent sagging over time.
Adding Cable Management Answers
Installing cable ties and clips behind the TV area keeps wires organized and prevents tangling of power cords and HDMI cables. We can drill small holes through the back panel to route cables cleanly from devices to the television. This approach maintains the stand’s rustic appearance while providing modern functionality.
Creating a dedicated compartment houses cable boxes, gaming consoles, and streaming devices while keeping them accessible for maintenance. We can modify one of the pallet sections to include a hinged door or removable panel that conceals equipment from view. Strategic ventilation holes prevent overheating of electronic components housed within the stand.
Routing channels carved into the wood surface provide professional-looking cable pathways. We can use a router or chisel to create shallow grooves that guide cables along the stand’s edges and hide them from prominent viewing angles.
Make Your Own Accent Chairs Using Basic Woodworking

Creating custom accent chairs lets us design seating that perfectly matches our living room’s style while building valuable woodworking skills. We’ll walk through each essential step to create professional-quality chairs that rival expensive store-bought alternatives.
Frame Construction Fundamentals
Building a sturdy chair frame starts with selecting the right lumber and cutting precise joints for long-lasting durability. We recommend using hardwood like oak or maple for the main frame components, as these materials provide excellent strength and stability for frequent use.
Cutting and measuring the frame pieces requires careful attention to detail and proper tool usage. We’ll need a table saw to make clean, straight cuts on all lumber pieces, ensuring each component fits together seamlessly during assembly. Using a drill press helps us create perfectly aligned holes for screws and dowels, which prevents splitting and ensures professional-looking joints.
Joining techniques form the backbone of chair construction, with mortise and tenon joints offering the strongest connection points. We can also use pocket screws for hidden fasteners that maintain clean lines while providing exceptional holding power. Cross-bracing between the legs adds extra stability and prevents wobbling during everyday use.
Assembly order matters significantly when constructing the frame, starting with the back legs and backrest before attaching the front legs and seat frame. We should dry-fit all pieces before applying wood glue to ensure proper alignment and make any necessary adjustments. Clamping the assembled frame overnight allows the glue to cure completely before moving to the next steps.
Cushioning and Upholstery Options
Selecting appropriate cushioning materials determines both comfort levels and the chair’s longevity under regular use. High-density foam provides the best balance of support and durability, maintaining its shape even after years of daily sitting.
Foam selection varies based on intended use, with 2-inch thick high-density foam working well for most accent chairs. We can layer different foam densities to create custom comfort levels, placing firmer foam at the bottom and softer foam on top for optimal support. Memory foam adds luxury but costs more and may retain heat during extended sitting sessions.
Fabric choices range from durable cotton blends to elegant leather options, each offering different maintenance requirements and aesthetic appeal. We should consider traffic levels when selecting materials, choosing performance fabrics for high-use areas and decorative fabrics for occasional seating. Leather provides timeless appeal and easy cleaning but requires exact tools and techniques for proper installation.
Upholstery techniques begin with cutting fabric pieces to size, adding 4-6 inches on all sides for proper wrapping and securing. We’ll use a staple gun to attach fabric to the chair frame, starting at the center of each side and working outward to prevent bunching. Professional results come from maintaining consistent tension and creating neat corners through proper folding techniques.
Finishing Touches and Paint Techniques
Applying the right finish protects our woodwork while improving the chair’s natural beauty and complementing our room’s decor. We have several finishing options depending on our desired look and protection needs.
Surface preparation involves thorough sanding with progressively finer grits, starting with 120-grit and finishing with 220-grit sandpaper. We must remove all dust between sanding steps using a tack cloth to ensure smooth finish application. Any dents or scratches should be filled with wood filler and sanded flush before proceeding.
Staining options allow us to match existing furniture or create contrasting accent pieces that draw attention. We can achieve different effects through techniques like distressing, which involves selectively sanding edges and high-wear areas to simulate natural aging. Multiple stain coats build depth and richness, with light sanding between applications for optimal results.
Protective finishes like polyurethane or varnish provide essential protection against daily wear and moisture damage. We should apply thin, even coats using a high-quality brush or foam applicator, maintaining wet edges to prevent lap marks. Three coats typically provide adequate protection, with light sanding using 320-grit paper between coats for adhesion.
Build Modular Bookshelf Units for Flexible Storage

Modular bookshelf units offer the perfect balance of functionality and adaptability for your living room storage needs. We’ll create customizable storage answers that grow and change with your space requirements.
Planning Your Modular Design System
Measure your living room space carefully to determine the exact dimensions where your bookshelf will be positioned. We recommend taking measurements at multiple points along the wall since older homes often have slight variations in wall alignment.
Select durable materials like solid wood or high-quality MDF that can support the weight of books and decorative items. Pine and oak work exceptionally well for beginners, while MDF provides a smooth surface that’s perfect for painting.
Design for maximum flexibility by planning adjustable shelves that accommodate items of varying heights. Standard shelf depths range from 10 to 12 inches for books, but we suggest going with 12 inches to allow space for larger items like photo frames and decorative boxes.
Create a modular grid system where individual units can be stacked, arranged side by side, or reconfigured as your needs change. Standard module dimensions of 24 inches wide by 30 inches tall work well for most living room layouts.
Cutting and Joining Techniques
Cut your wood pieces using a circular saw or miter saw for clean, straight edges that ensure professional looking results. We always cut boards slightly longer than needed, then trim to exact dimensions for perfect fits.
Join frame pieces using wood screws rather than nails for stronger connections that can be disassembled if needed. Pre drill holes to prevent wood splitting, especially when working near board edges.
Assemble the basic frame by connecting the top, bottom, and side panels first before adding internal components. Clamps help maintain square corners while you secure joints with screws.
Reinforce connections with wood glue applied to joints before inserting screws for maximum strength. Allow glue to set for 24 hours before adding weight to newly assembled sections.
Creating Adjustable Shelf Options
Install shelf pin systems by drilling precise holes along the interior sides of your bookshelf frame at regular intervals. We space holes 2 inches apart vertically to provide maximum adjustment flexibility.
Use a drill template to ensure perfectly aligned holes that will support shelves evenly without wobbling. Metal shelf pins support more weight than plastic alternatives and last longer with frequent adjustments.
Add adjustable brackets as an alternative to shelf pins for heavier items or wider spans. L shaped metal brackets can be repositioned easily and provide excellent support for books and storage boxes.
Consider sliding shelf tracks for the ultimate in adjustability, allowing shelves to be repositioned without removing items. These systems work particularly well for frequently accessed storage areas where you’ll regularly reorganize contents.
Craft a Statement Console Table for Your Entryway
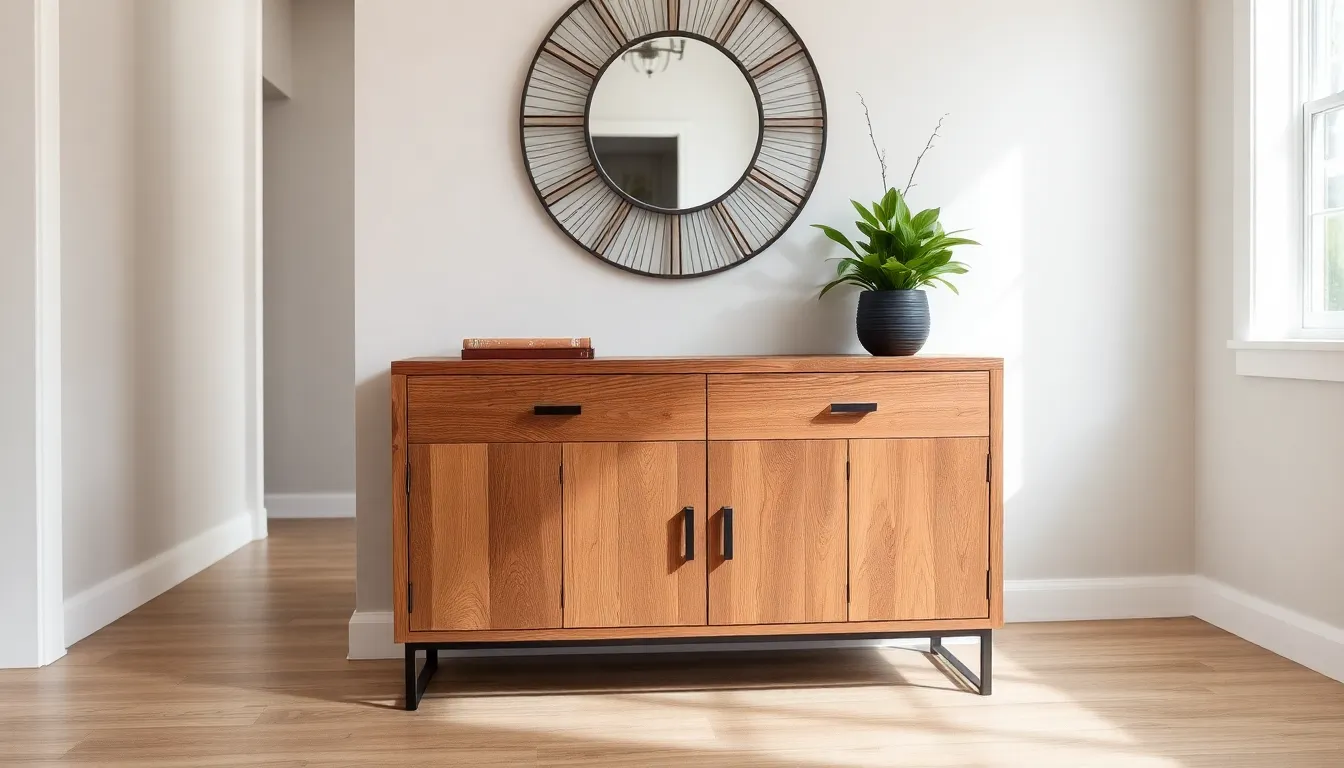
Building a custom console table transforms your entryway into a welcoming focal point that guests notice immediately. We’ll guide you through creating this versatile piece that serves both functional and aesthetic purposes in your living space.
Choosing Between Modern and Traditional Styles
Selecting the right design approach sets the foundation for your console table project. Modern styles emphasize clean lines and minimalist aesthetics, incorporating materials like tempered glass tops or sleek metal legs that create an open, airy feel. Contemporary designs often feature geometric shapes and neutral color palettes that complement existing furniture without overwhelming the space.
Traditional console tables showcase classic proportions and ornate details that add timeless elegance to your entryway. Decorative molding, turned legs, and curved aprons create visual interest while maintaining sophisticated appeal. Rich wood tones like cherry or mahogany enhance the traditional aesthetic and provide warmth to your entrance area.
Consider your existing decor when making this crucial design decision. Homes with contemporary furnishings benefit from streamlined console tables with minimal ornamentation, while spaces featuring vintage or classic pieces call for more detailed woodwork and traditional joinery techniques.
Working With Different Wood Types
Oak delivers exceptional durability and showcases prominent grain patterns that create visual depth in your console table project. This hardwood accepts stain beautifully and withstands daily use while maintaining its structural integrity over decades. We recommend oak for traditional designs where strength and classic appearance matter most.
Pine offers affordability without sacrificing workability, making it perfect for beginning woodworkers tackling their first console table project. Pine stains easily to achieve modern looks or can be painted to match exact color schemes in your entryway. But, pine requires careful handling due to its softer nature and tendency to dent under heavy use.
Reclaimed wood brings unique character and environmental benefits to your console table construction. Weathered barn wood or salvaged fence planks create rustic charm while reducing waste and adding authentic patina that new lumber cannot replicate. Each piece tells a story through nail holes, weathering patterns, and natural aging that makes your console table truly one of a kind.
Hardware Selection and Installation
Choosing appropriate hardware significantly impacts both functionality and visual appeal of your finished console table. Modern metal pulls in brushed nickel or matte black complement contemporary designs, while traditional brass handles enhance classic styling and provide lasting durability. Consider the scale of your hardware relative to the table size to maintain proper proportions.
Installing hardware requires precise measurements and proper tools to achieve professional results. Mark mounting holes carefully using a template or measuring tape, then drill pilot holes to prevent wood splitting during installation. We recommend using screws that extend at least two thirds through the table thickness for secure attachment.
Quality hinges become essential if your console table includes storage compartments or flip up sections. European style hinges provide smooth operation and adjustability, while traditional butt hinges offer reliability and classic appearance. Apply wood glue to mounting screws for extra security in high use applications like entryway furniture that experiences frequent opening and closing.
Design Custom Side Tables With Built-In Features
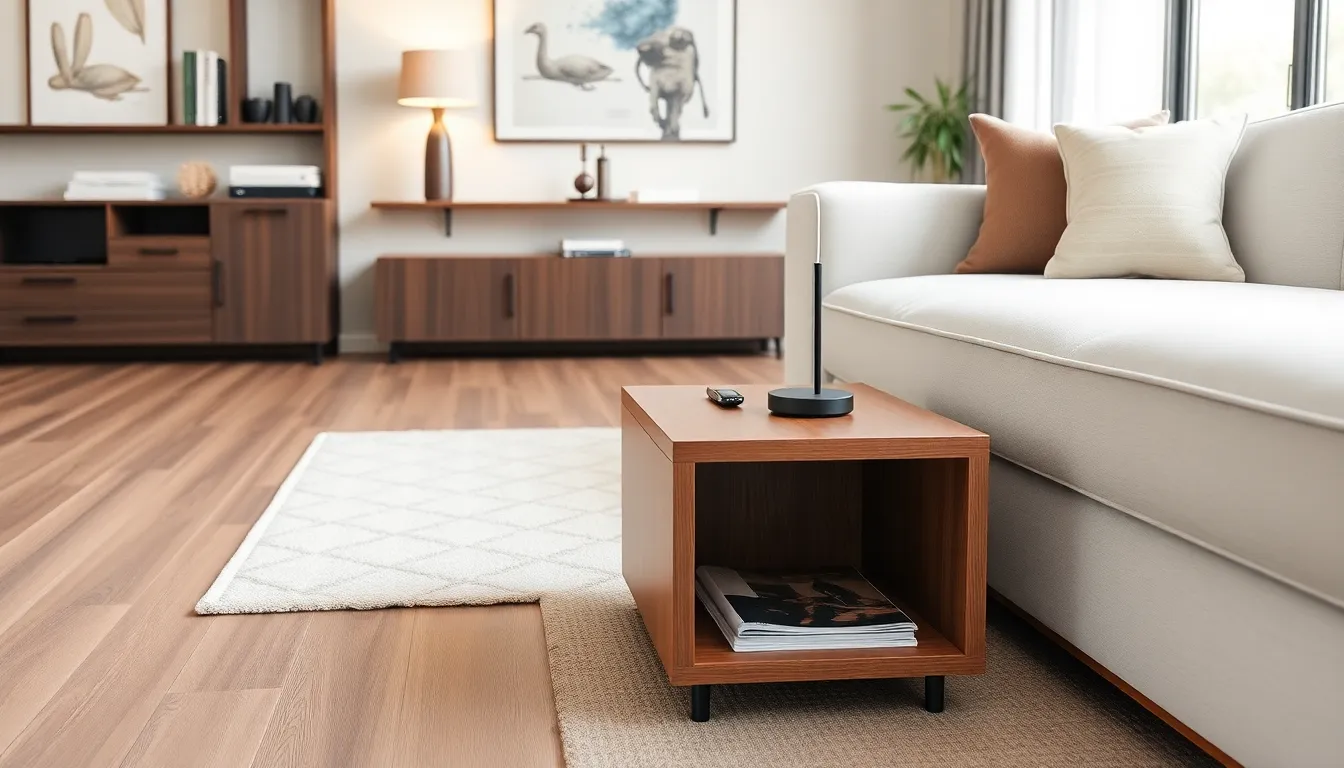
Custom side tables offer the perfect opportunity to combine style with modern functionality in our living rooms. We can create customized pieces that address exact needs while maintaining the aesthetic appeal that complements our existing decor.
Adding USB Charging Stations
Installing USB charging stations transforms ordinary side tables into modern convenience hubs for our electronic devices. We recommend incorporating internal wiring by installing a small power strip inside the table’s base or drawer compartment.
Surface ports provide the cleanest appearance when we drill discreet holes to mount USB outlets flush with the tabletop. This method ensures our charging stations remain accessible while maintaining the table’s sleek design.
Safety becomes paramount when we use pre-assembled charging modules from electronics suppliers rather than attempting complex electrical work ourselves. These modules offer straightforward installation while ensuring proper electrical standards are met.
Incorporating Magazine Storage
Magazine storage integration keeps our reading materials organized and easily accessible without cluttering the living room space. We can add slim shelves beneath the tabletop for quick access to frequently used magazines and newspapers.
Vertical dividers installed inside larger drawers help keep magazines upright and prevent them from sliding around during use. This organization method maximizes storage capacity while maintaining neat arrangements.
Pull-out compartments designed as shallow, wide drawers work exceptionally well for magazine storage since they’re specifically sized for standard publication dimensions. We can customize these compartments to accommodate both magazines and newspapers in separate sections.
Creating Pull-Out Drawer Systems
Pull-out drawer systems maximize utility in compact living rooms by providing hidden storage that doesn’t compromise floor space. We install full-extension drawer slides to ensure smooth, easy access to stored items throughout the drawer’s entire depth.
Hidden storage maintains our table’s streamlined appearance when we use inset or recessed handles instead of protruding hardware. This design choice keeps the focus on the table’s overall aesthetic while providing functional access.
Multipurpose drawers with adjustable dividers accommodate both small and large items, making our side tables incredibly versatile storage answers. We can reconfigure these dividers as our storage needs change over time.
Construct a Comfortable Reading Nook Bench
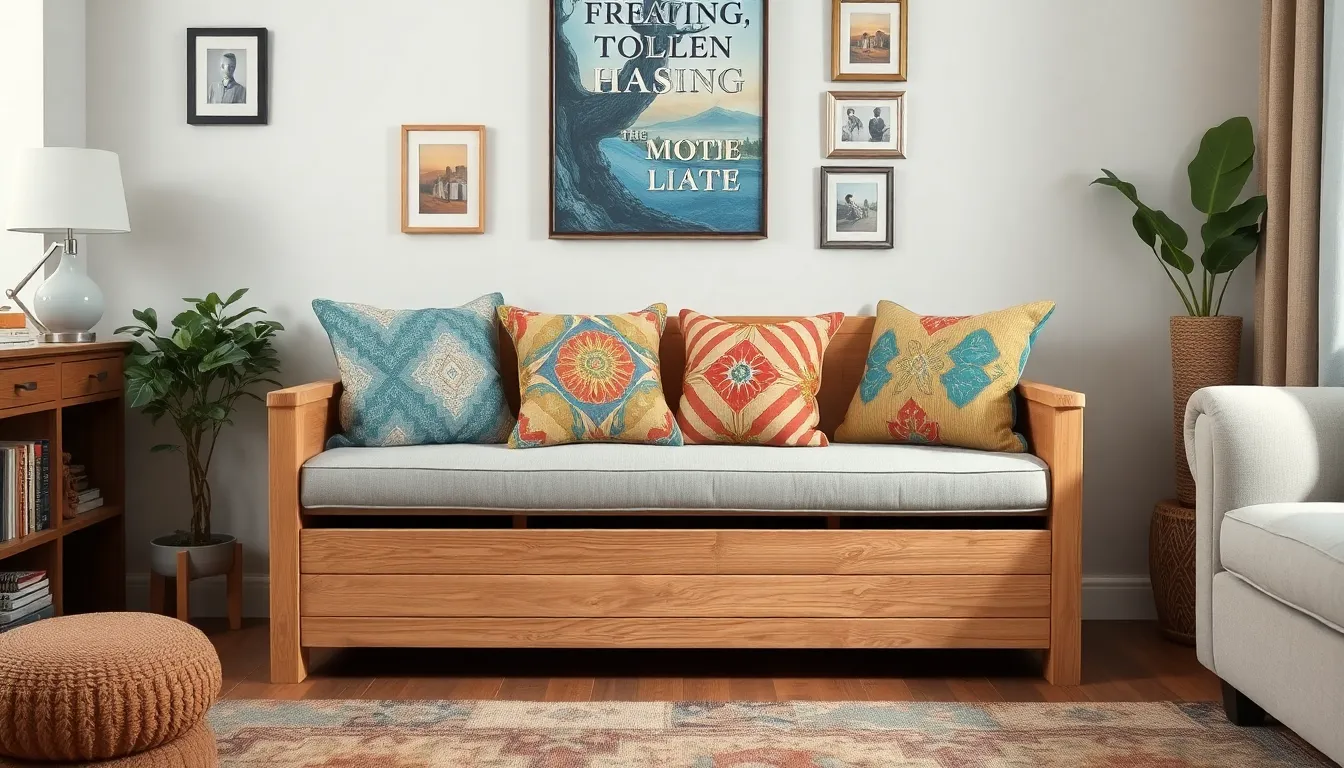
We’ll create a versatile seating solution that transforms any corner into your personal reading retreat. This DIY reading nook bench combines comfort with practical storage while maintaining the custom aesthetic we’ve been building throughout our living room transformation.
Building the Base Structure
Determine your bench dimensions by measuring your intended space, with most reading nooks requiring benches between 36 to 72 inches long, 16 to 20 inches wide, and 16 to 20 inches high. We recommend using 2×4 or 4×4 wood for the frame construction to ensure durability and stability.
Assemble the rectangular box frame by connecting four sides with wood screws and carpenter’s glue for maximum strength. Position vertical supports at regular intervals throughout the frame to prevent sagging under weight. We’ve found that spacing these supports every 16 to 24 inches provides optimal stability for daily use.
Attach plywood or OSB panels to both the top and bottom of your frame structure. The top panel serves as your seating platform while the bottom creates a stable floor for the storage compartment. Sand all edges thoroughly to eliminate splinters and create smooth surfaces for the finishing steps.
Pre cut all wood pieces before beginning assembly to streamline your construction process. Double check each measurement before making cuts, as precision during this stage prevents costly mistakes later in the project.
Adding Cushioning and Pillows
Cover the seating surface with high density foam cut to match your bench dimensions, typically using 2 to 4 inches of thickness for optimal comfort. Secure this foam layer using spray adhesive to prevent shifting during use.
Wrap the foam and plywood base with batting using a staple gun, ensuring you create smooth edges without bunching or gaps. Pull the batting taut while stapling to achieve a professional upholstered appearance.
Select sturdy, washable upholstery fabric that complements your existing living room decor and can withstand daily use. Staple the fabric to the underside of your seating platform, maintaining consistent tension while working around corners and edges.
Add decorative pillows for enhanced back and side support, choosing fabrics that coordinate with your bench upholstery. Mix textured and solid color pillows to create visual interest while providing the ergonomic support needed for extended reading sessions.
Incorporating Under-Seat Storage
Design a hinged lid system by installing the seating platform as a removable top that opens to reveal storage space beneath. Piano hinges work best for this application, providing smooth operation and supporting the weight of both the lid and anyone sitting on the bench.
Create open cubbies or fabric storage bins beneath the seat for easy access to books, blankets, and reading accessories. These compartments keep your reading materials organized while maintaining the clean aesthetic of your custom furniture piece.
Ensure hinge quality and strength by selecting hardware rated for frequent use and the combined weight of the lid plus occupants. Test the opening mechanism several times during construction to verify smooth operation and proper weight distribution.
Apply paint or stain to match your room’s existing color scheme, creating a cohesive look that ties into the other DIY furniture pieces we’ve constructed. Regular maintenance of moving parts like hinges ensures your reading nook bench continues functioning smoothly for years of comfortable use.
Transform Old Furniture Into Modern Living Room Pieces

We can breathe new life into outdated furniture pieces by applying proven refinishing methods and strategic updates. Transforming existing pieces saves money while creating unique focal points that reflect our personal style.
Refinishing Techniques for Different Materials
Wood furniture responds beautifully to proper surface preparation and finishing techniques. We start by using sandpaper to smooth out imperfections and create an even base for our chosen finish. Applying a fresh stain or paint transforms the piece to match our current living room decor perfectly.
Metal pieces require thorough cleaning before we begin the refinishing process. We clean all surfaces to remove rust, dirt, and old paint residue. Repainting metal furniture with modern colors instantly updates the look and protects against future wear.
Plastic furniture benefits from primer application before we add our final color coat. We use high-quality primer specifically designed for plastic surfaces to ensure proper paint adhesion. Applying paint in thin, even coats creates a professional appearance that rivals store-bought pieces.
Updating Hardware and Accessories
Replacing handles creates instant visual impact on drawers and cabinet doors throughout our living space. We choose modern knobs or pulls that complement our room’s aesthetic while ensuring they’re the right size for existing holes. Contemporary hardware styles like brushed gold or matte black add sophisticated touches to older pieces.
Adding new upholstery transforms worn seating into fresh, comfortable furniture that matches our current style preferences. We select durable fabric that can withstand daily use while coordinating with our room’s color scheme. Reupholstering chair seats or armrests extends the furniture’s life significantly while creating custom pieces customized to our needs.
Color Coordination With Existing Decor
Choosing complementary colors ensures our refreshed furniture integrates seamlessly with our current living room design. We select hues that enhance rather than compete with existing elements like wall colors, rugs, and artwork. Strategic color choices create visual harmony throughout the space.
Using neutral backgrounds allows us to highlight statement pieces while maintaining design flexibility for future updates. We apply colors like beige or gray as foundational tones that work with various accent colors. Neutral bases provide versatility when we want to change seasonal decor or add new accessories to our living room.
Conclusion
We’ve shown you how to transform your living room without very costly through creative DIY furniture projects. From rustic coffee tables to functional storage ottomans and sleek floating shelves these ideas prove that custom pieces can elevate your space while reflecting your personal style.
The beauty of DIY furniture lies in its adaptability to your exact needs and space constraints. Whether you’re building modular bookshelves that grow with your collection or crafting a statement console table that serves as a focal point these projects offer endless customization possibilities.
Remember that every piece you create becomes a conversation starter and a reflection of your creativity. With the right tools materials and patience you’ll develop valuable woodworking skills while building furniture that’s perfectly customized to your lifestyle and aesthetic preferences.
Frequently Asked Questions
What are the main benefits of DIY furniture for living rooms?
DIY furniture offers significant cost savings compared to store-bought pieces while allowing you to create custom designs that perfectly fit your space and style. You can repurpose existing materials or use reclaimed wood for unique character, and projects can be tailored to various skill levels from simple weekend builds to complex designs.
What materials work best for building a DIY coffee table?
Reclaimed wood is an excellent choice, including weathered barn wood or old fence planks for rustic charm. Always inspect reclaimed materials for quality, checking for structural integrity and pest damage. You’ll also need basic hardware like screws, wood glue, and finishing materials for a professional result.
How do I build storage ottomans that serve multiple purposes?
Use high-density foam for comfortable cushioning and select durable fabric that matches your decor. Build the frame using wood or MDF panels with proper dimensions for your space. Install quality hinges for the hidden storage compartment and sand all surfaces for a smooth, professional finish.
What’s the best way to install floating shelves securely?
Locate wall studs using a stud finder and use hidden bracket systems for clean aesthetics. Measure carefully and maintain consistent spacing between shelves. Use a level to ensure proper alignment and choose appropriate shelf depths (typically 6-10 inches) based on what you plan to display.
How can I create a rustic TV stand from pallets?
Carefully disassemble pallets and inspect each board for quality and structural integrity. Sand all surfaces smooth, then stack and secure boards with screws and cross-braces for stability. Include cable management solutions like ties and dedicated compartments to keep electronics organized and cords hidden.
What wood types work best for custom accent chairs?
Hardwoods like oak or maple provide excellent durability for chair frames. Use precise cutting and strong joinery methods such as mortise and tenon joints. Always dry-fit pieces before final assembly and allow wood glue to cure completely for maximum strength and longevity.
How do I design modular bookshelf units?
Plan measurements carefully and choose durable materials like solid wood or high-quality MDF. Design adjustable shelves for maximum flexibility and use wood screws with wood glue for stronger connections. Consider how the unit can adapt as your storage needs change over time.
What should I consider when building a console table?
Choose between modern or traditional styles based on your existing decor. Select appropriate wood types: oak for durability, pine for affordability, or reclaimed wood for character. Pay attention to hardware selection and installation, using quality hinges and precise measurements for professional results.
How can I add modern features to custom side tables?
Integrate USB charging stations using pre-assembled modules for safety. Add magazine storage with slim shelves or pull-out compartments. Install full-extension drawer slides with inset handles for a streamlined look while maximizing utility in compact spaces.
What’s involved in building a reading nook bench with storage?
Build a sturdy base using 2×4 or 4×4 wood for durability. Add high-density foam cushioning with quality upholstery fabric. Install a hinged lid system for under-seat storage access. Use quality materials and hardware to ensure longevity and achieve a cohesive design.
How can I update old furniture instead of building new pieces?
Refinish wood, metal, or plastic furniture using appropriate preparation and finishing techniques for each material. Update hardware like handles and hinges, reupholster seating, and coordinate colors with existing decor using complementary hues or neutral backgrounds for a cohesive look.

