Transforming a small guest bathroom into a stylish and functional space doesn’t have to expensive or overwhelm your design skills. We’ve discovered that even the tiniest powder rooms can become stunning focal points that leave lasting impressions on visitors.
Smart storage answers maximize every square inch while clever design tricks create the illusion of more space. From floating vanities that open up floor space to strategic mirror placement that bounces light around the room we’ll show you how to make your compact guest bathroom feel surprisingly spacious.
Whether you’re working with a cramped half-bath or a narrow full bathroom we’ve compiled practical ideas that deliver maximum impact. These budget-friendly transformations prove that size limitations can actually spark the most creative and memorable design answers for your home.
Maximize Storage With Floating Shelves and Wall-Mounted Fixtures
Vertical storage transforms cramped guest bathrooms into organized sanctuaries. Wall mounted answers free up precious floor space while maintaining easy access to essentials.
Install Floating Corner Shelves for Toiletries
Corner shelves use every inch of unused wall space in your compact guest bathroom. We recommend installing triangular floating shelves in bathroom corners to hold toiletries like shampoo bottles, soap dispensers, and washcloths without cluttering countertops.
Position corner shelves strategically above the toilet tank or beside the vanity mirror for maximum accessibility. Glass or acrylic floating shelves create visual lightness while wooden options add warmth to sterile bathroom environments.
Secure mounting becomes crucial when dealing with bathroom humidity and weight loads. Use appropriate wall anchors rated for 15-20 pounds per shelf to support multiple toiletry items safely.
| Corner Shelf Type | Weight Capacity | Best Location | Price Range |
|---|---|---|---|
| Glass floating | 10-15 lbs | Above toilet | $25-45 |
| Wood triangular | 15-20 lbs | Shower corner | $35-65 |
| Metal wire | 8-12 lbs | Vanity corner | $20-35 |
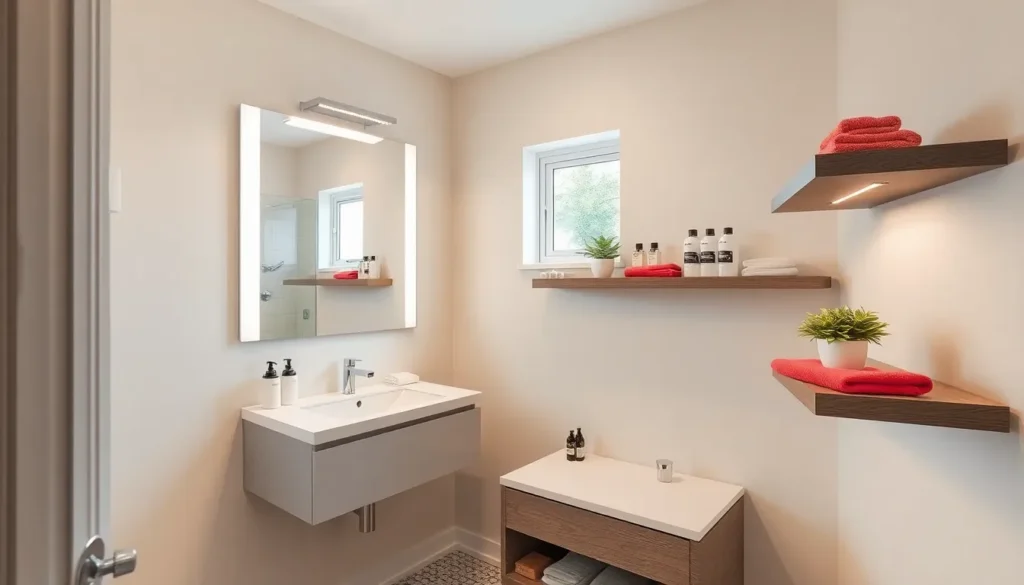
Choose Wall-Mounted Vanities to Create Floor Space
Wall mounted vanities instantly make small guest bathrooms appear larger by exposing floor space underneath. This design trick creates visual continuity that tricks the eye into perceiving more square footage than actually exists.
Floating vanities offer practical benefits beyond aesthetics by simplifying floor cleaning and maintenance routines. We suggest choosing vanities with built in drawers or shelving to replace lost under sink storage space.
Installation height matters significantly for both function and visual appeal. Mount floating vanities 32-36 inches from floor level to accommodate most guest heights comfortably while maintaining proportional appearance.
Consider plumbing modifications before committing to wall mounted vanities since relocating water lines may require professional assistance. Some floating vanity models accommodate existing plumbing configurations without major renovations.
Add Over-Toilet Storage Cabinets
Over toilet storage cabinets maximize vertical space in the most underutilized bathroom area. These space saving answers provide enclosed storage for extra toilet paper, towels, and cleaning supplies without requiring additional floor space.
Cabinet depth should remain proportional to avoid overwhelming small guest bathroom dimensions. We recommend choosing units no deeper than 8-10 inches to maintain comfortable movement around the toilet area.
Open shelving versus closed cabinets depends on your storage needs and aesthetic preferences. Closed cabinets hide clutter while open shelves display decorative items like candles, plants, or rolled towels for visual appeal.
Stability requires proper wall anchoring especially for cabinets holding heavier items like towel stacks or cleaning product bottles. Use toggle bolts or wall studs to support cabinet weight safely over time.
Create Visual Space With Light Colors and Strategic Lighting
 2")
Lighting and color choices can instantly transform our small guest bathroom from cramped to spacious. These strategic design elements work together to create the illusion of a larger, more inviting space.
Paint Walls in Light, Neutral Tones
Light colors reflect more light than dark shades, making our small guest bathroom appear larger and brighter. We recommend painting walls in white, cream, or beige to maximize this visual expansion effect.
White walls create the most dramatic space improving impact by reflecting available light throughout the room. Cream tones add warmth while maintaining the spacious feel that light colors provide. Beige offers a sophisticated neutral backdrop that complements various fixture finishes and decorative accents.
These neutral paint choices also provide versatility for future decor changes without requiring a complete color overhaul. Light wall colors make our bathroom fixtures appear more prominent and well defined against the bright background.
Install Bright LED Vanity Lighting
LED vanity lighting eliminates shadows and creates even illumination that makes our bathroom feel more open. Bright lighting fixtures positioned around the mirror area provide optimal visibility for daily grooming tasks.
We suggest installing LED strip lights or multiple LED bulbs around the vanity mirror for comprehensive coverage. These energy efficient options produce more lumens per watt than traditional incandescent bulbs while generating less heat in our compact space.
Side mounted LED fixtures prevent unflattering shadows on faces during mirror use. Dimmer switches allow us to adjust brightness levels for different times of day and create ambient lighting when needed.
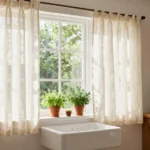
Add Natural Light With Skylights or Larger Windows
Natural light sources make our small guest bathroom feel connected to the outdoors and significantly more spacious. Skylights bring sunlight from above without compromising wall space needed for fixtures and storage.
Installing a skylight directly over the vanity area provides excellent task lighting during daytime hours. We can choose fixed skylights for budget conscious installations or operable versions for ventilation benefits.
Enlarging existing windows or adding new ones floods our bathroom with daylight while maintaining privacy through frosted glass or strategic placement. Window treatments like sheer curtains allow natural light penetration while providing necessary privacy coverage.
Natural light reduces our dependence on artificial lighting during peak daylight hours and creates a more pleasant bathing environment for guests.
Choose Space-Saving Fixtures and Compact Designs
 4")
Strategic fixture selection can dramatically transform your small guest bathroom’s functionality and visual appeal. We’ll explore three key fixtures that maximize every square inch while maintaining essential bathroom features.
Install a Pedestal Sink Instead of a Vanity
Pedestal sinks create an immediate sense of spaciousness by opening up valuable floor space that traditional vanities typically consume. These elegant fixtures eliminate the visual weight of bulky cabinets, allowing your eye to travel uninterrupted across the bathroom floor. We recommend measuring your current vanity footprint to understand exactly how much additional space you’ll gain from this simple swap.
Traditional vanities can consume up to 24 inches of depth, while pedestal sinks typically require only 18 inches from the wall. This 6-inch difference translates to significantly more maneuvering room in tight quarters. Modern pedestal sinks come in various styles, from classic white porcelain to contemporary angular designs that complement any décor theme.
Select a Corner Toilet to Maximize Floor Space
Corner toilets efficiently use the often-wasted triangular space where two walls meet, freeing up the center area for easier movement. These specialized fixtures fit snugly into corners while maintaining standard comfort and functionality. We’ve found that corner toilets work particularly well in narrow guest bathrooms where every inch counts.
Standard toilets project approximately 28 inches from the wall, while corner models can reduce this footprint by positioning the tank diagonally. This arrangement creates more open floor space in the bathroom’s center, making the room feel less cramped. Corner toilets are available in both one-piece and two-piece configurations to match your installation preferences and budget.
Consider a Shower-Tub Combo for Dual Functionality
Shower-tub combinations provide both bathing options without requiring additional square footage that separate fixtures would demand. These versatile units maximize your bathroom’s functionality while maintaining a clean, streamlined appearance. We recommend choosing models with sliding glass doors rather than curtains to enhance the sense of openness.
Combination units typically measure 60 inches in length and 30 inches in width, fitting perfectly into standard bathroom alcoves. Modern combo units feature low-profile thresholds for easy entry and built-in storage niches for toiletries. Some models include rainfall showerheads and handheld options, giving your guests a luxurious experience even though the compact footprint.
Add Personality With Bold Accent Walls and Statement Pieces
 6")
Bold accent walls and statement pieces transform small guest bathrooms from ordinary to extraordinary. Creating visual interest through strategic design elements draws attention away from the compact size while adding character to the space.
Create a Feature Wall With Patterned Wallpaper
Patterned wallpaper serves as the perfect solution for adding visual depth to cramped guest bathrooms. Geometric patterns create the illusion of expanded space by drawing the eye around the room in ever-changing ways. Vibrant botanical prints bring energy and freshness to neutral bathroom palettes without overwhelming the limited square footage.
Textured wallpaper options like grasscloth or subtle embossed designs add tactile interest while maintaining sophisticated appeal. Vertical stripe patterns elongate walls and make ceilings appear higher in compact spaces. Bold florals work exceptionally well behind pedestal sinks or toilets to create dramatic focal points that guests will remember.
Application techniques matter significantly in small bathrooms due to humidity concerns. Vinyl or vinyl-coated wallpapers resist moisture better than traditional paper options. Professional installation ensures proper adhesion and longevity in high-humidity environments.
Install Eye-Catching Mirror Designs
Large mirrors above vanities create instant depth illusions that double the perceived bathroom size. Oversized round mirrors soften angular bathroom fixtures while reflecting light throughout the compact space. Decorative mirrors with unique frames transform functional necessities into artistic statement pieces.
Positioning strategies maximize the visual expansion effect in guest bathrooms. Mirrors placed opposite windows reflect natural light and outdoor views into interior spaces. Multiple smaller mirrors arranged in clusters create gallery wall effects that add personality without requiring floor space.
Frame selections significantly impact the overall bathroom aesthetic. Vintage brass frames complement traditional design schemes while adding warmth to cool-toned spaces. Modern black metal frames provide striking contrast against light walls and enhance contemporary bathroom styles. Ornate antique frames bring character and history to otherwise sterile guest bathroom environments.
Incorporate Colorful Artwork or Decorative Elements
Colorful artwork injects personality into small guest bathrooms through strategic wall displays. Framed prints resist bathroom humidity better than canvas paintings when properly sealed behind glass. Gallery walls featuring multiple small pieces create visual interest without overwhelming compact wall space.
Decorative elements enhance bathroom ambiance through carefully chosen accessories. Vintage soap holders add functional charm while maintaining authentic period appeal. Colorful towels serve dual purposes as both practical necessities and decorative accents that brighten neutral color schemes.
Plant life brings natural freshness to small guest bathroom environments. Small potted plants thrive in bathroom humidity while improving air quality for guests. Hanging planters maximize vertical growing space without cluttering limited counter surfaces. Artificial greenery provides similar visual benefits in windowless bathrooms where natural plants struggle to survive.
Optimize Layout With Smart Placement and Traffic Flow
 8")
Strategic placement of fixtures and thoughtful traffic flow design can transform even the tiniest guest bathroom into a functional and comfortable space. Smart layout decisions maximize every square inch while ensuring guests feel at ease handling the area.
Position the Toilet Away From the Entry Door
Placing the toilet away from the entry door creates immediate privacy and improves the overall aesthetic appeal of your guest bathroom. This positioning helps maintain dignity for guests while preventing an awkward first impression when someone opens the door.
Consider installing the toilet on a side wall or in a corner opposite the entrance to maximize privacy. This arrangement also allows for better ventilation and creates a more welcoming atmosphere when guests first enter the space.
Visual barriers like a small privacy screen or strategically placed storage unit can further enhance comfort levels. These additions don’t require major plumbing changes but significantly improve the guest experience.
Create Clear Pathways Between Fixtures
Clear pathways between fixtures prevent cramped navigation and reduce the risk of accidents in tight spaces. We recommend maintaining at least 15 inches of clearance around the toilet and 30 inches in front of the vanity for comfortable movement.
Remove unnecessary obstacles like oversized decorative items or bulky storage pieces that block natural walking paths. This approach makes the bathroom feel more spacious and allows guests to move freely without bumping into fixtures.
Strategic fixture placement creates natural flow patterns that guide movement through the space. Position the vanity near the entrance for easy access while keeping the toilet and shower areas more private toward the back of the room.
Use Pocket Doors to Save Swing Space
Pocket doors eliminate the need for traditional door swing clearance, instantly freeing up valuable floor space in small guest bathrooms. These space saving answers slide into the wall cavity rather than opening into the room.
Installing pocket doors can reclaim up to 9 square feet of usable space in a typical small bathroom layout. This recovered area allows for additional storage answers or simply creates a more open feeling environment.
Consider the wall construction requirements before installation, as pocket doors need adequate wall thickness to accommodate the sliding mechanism. Professional installation ensures proper function and prevents future maintenance issues that could inconvenience guests.
Hardware selection impacts both functionality and aesthetics, with options ranging from traditional handles to modern flush pulls that complement your bathroom’s design style.
Incorporate Multi-Functional Elements and Hidden Storage
 10")
Maximizing functionality in small guest bathrooms requires strategic choices that serve multiple purposes while maintaining a sleek appearance.
Choose Mirrors With Built-In Storage
We recommend selecting mirrors that feature integrated storage compartments to maximize your bathroom’s functionality. These innovative fixtures provide essential space for toiletries, medications, and grooming supplies while maintaining the clean aesthetic your guests expect. Mirrored medicine cabinets offer the perfect blend of reflection and concealed storage, allowing you to keep personal items hidden from view.
Recessed mirror cabinets work particularly well in tight spaces since they don’t protrude into the room. Surface mounted options with shallow depths can accommodate basic necessities like toothbrushes, razors, and small bottles without overwhelming the space. We suggest choosing models with soft close hinges to prevent slamming and ensure long lasting durability in humid bathroom environments.
Install Towel Bars That Double as Shelving
Installing towel bars with integrated shelving creates valuable storage opportunities without sacrificing wall space. These dual purpose fixtures allow you to hang towels while providing display areas for decorative items, extra toiletries, or folded washcloths. We’ve found that combination towel bars with small shelves above or below work exceptionally well for storing hand soaps, lotions, and other frequently used items.
Heated towel bars with shelving components offer luxury functionality in compact spaces. These fixtures keep towels warm and dry while providing additional storage for bathroom essentials. Chrome and brushed nickel finishes resist moisture damage and complement most bathroom color schemes.
Add Storage Baskets Under Wall-Mounted Sinks
Positioning storage baskets beneath wall mounted sinks transforms unused space into practical storage areas. We recommend choosing baskets that fit the sink’s proportions and complement your bathroom’s design aesthetic. Wicker baskets add natural texture and warmth, while wire baskets provide modern industrial appeal and easy visibility of contents.
These baskets can hold extra toilet paper, cleaning supplies, hair styling tools, and guest amenities without cluttering visible surfaces. Fabric lined baskets protect delicate items and create a more polished appearance. We suggest selecting baskets with handles for easy removal during cleaning and organizing sessions.
Use Vertical Space Effectively With Tall Design Elements
 12")
Creating vertical emphasis transforms cramped guest bathrooms into spacious retreats that feel dramatically larger than their actual square footage.
Install Floor-to-Ceiling Tile Patterns
Floor-to-ceiling tile patterns visually extend your walls and create a cohesive, expansive atmosphere that guests immediately notice. Vertical subway tiles arranged in a straight stack pattern elongate the space more effectively than traditional brick patterns. Large format tiles minimize grout lines and create uninterrupted visual flow from floor to ceiling.
Stripe patterns using alternating tile colors guide the eye upward while adding sophisticated design interest. We recommend choosing tiles in light colors to maximize the space-expanding effect and reflect more natural light throughout the room. Textured tiles add depth without overwhelming the compact space, creating tactile interest that enhances the overall design scheme.
Add Tall, Narrow Storage Towers
Tall, narrow storage towers maximize vertical real estate while maintaining easy access to bathroom essentials. These sleek units fit perfectly in corners or beside vanities without encroaching on valuable floor space. We suggest choosing towers with multiple compartments to organize toiletries, towels, and guest supplies efficiently.
Freestanding towers offer flexibility for renters who can’t modify walls permanently. Built-in versions create seamless integration with existing fixtures and provide more stability in humid environments. Open shelving displays decorative items and creates an airy feel, while closed cabinets conceal clutter and maintain clean lines.
Material choices like bamboo or white-painted wood complement various design styles while resisting moisture damage. Height measurements between 60-72 inches optimize storage capacity without overwhelming the space or creating maintenance challenges.
Hang Artwork Higher to Draw Eyes Upward
Positioning artwork higher than traditional placement creates dramatic vertical emphasis that makes ceilings appear taller. We recommend hanging pieces 60-65 inches from the floor rather than the standard 57 inches to achieve this upward visual pull. Gallery walls arranged in vertical configurations amplify this height-improving effect.
Narrow, vertical artwork formats naturally complement the goal of emphasizing room height. Abstract pieces with vertical elements like waterfalls or tall trees reinforce the upward movement while adding personality to the space. We suggest using moisture-resistant frames and protective glass to ensure longevity in humid bathroom conditions.
Strategic lighting above artwork creates additional visual interest and draws attention to the elevated placement. Multiple smaller pieces arranged in ascending heights create ever-changing movement that guides eyes toward the ceiling and enhances the sense of spaciousness.
Create Luxury Feel With High-End Finishes on a Budget
 14")
Achieving a luxury aesthetic doesn’t require very costly when you know which elements deliver maximum visual impact. We’ll show you how to create an upscale atmosphere using strategic material choices and clever design techniques.
Choose Quality Hardware and Fixtures
Investing in premium hardware creates an immediate luxury upgrade that guests notice right away. Select brushed gold or matte black faucets and shower heads with sleek, modern profiles that complement your bathroom’s style. Quality fixtures like Kohler or Moen offer durability and sophisticated designs without the premium price tag of luxury brands.
Minimize your fixture count while maximizing their impact by choosing statement pieces over multiple smaller items. Replace basic towel bars with substantial, architecturally interesting hardware that serves as both function and decoration. Upgrade cabinet pulls and drawer handles to match your chosen finish, creating a cohesive look throughout the space.
Consider wall-mount faucets for vanities to free up counter space and create clean lines that scream luxury. These fixtures require professional installation but deliver dramatic visual impact that transforms the entire bathroom aesthetic. Temperature-control shower valves and rainfall shower heads provide spa-like experiences without the expense of full bathroom renovations.
Install Elegant Tile Backsplashes
Glass or mosaic tiles create sophisticated focal points that rival expensive marble installations at a fraction of the cost. We recommend installing subway tiles in a herringbone pattern behind the vanity to add visual interest and perceived value. Accent walls using statement tiles draw attention away from the room’s small size while creating luxury appeal.
Marble-look porcelain tiles offer authentic veining and texture without the maintenance requirements of natural stone. Position your tile backsplash from counter to ceiling to maximize visual height and create seamless elegance. Mix different tile sizes within the same color family to add depth and prevent the space from feeling monotonous.
Metallic accent tiles in gold or copper add warmth and luxury without overwhelming the small space. Strategic placement around mirrors or behind floating shelves creates focal points that catch and reflect light beautifully. Border treatments using contrasting grout colors define the backsplash area and add professional finishing touches.
Add Plush Towels and Spa-Like Accessories
Luxurious towels in coordinating colors instantly elevate the bathroom’s ambiance and provide tactile luxury for guests. We suggest Turkish cotton or bamboo towels in white, cream, or soft gray to maintain the sophisticated color palette. Layer different towel sizes on floating shelves or in decorative baskets for both storage and visual appeal.
Incorporate spa-inspired accessories like reed diffusers, pillar candles, and small succulents to create a resort-like atmosphere. Elegant soap dispensers in matching finishes to your hardware eliminate plastic bottle clutter while maintaining the upscale aesthetic. Glass containers for cotton swabs and makeup remover pads keep essentials organized while looking intentional and polished.
Add texture through natural elements like bamboo trays, stone soap dishes, and woven storage baskets that complement your luxury theme. Fresh eucalyptus branches or small orchids bring life to the space and enhance the spa-like experience. Quality bath mats in neutral tones provide comfort while maintaining the sophisticated color scheme throughout the bathroom.
Conclusion
Creating a stunning small guest bathroom doesn’t require a massive renovation budget or professional design experience. We’ve shown you how strategic storage answers clever lighting choices and smart layout decisions can transform even the tiniest spaces into impressive retreats that wow your guests.
The key lies in maximizing every square inch through vertical storage multi-functional fixtures and space-improving design tricks. From floating shelves to statement mirrors these elements work together to create both functionality and visual appeal.
Your small guest bathroom can become one of your home’s most memorable features. With these practical ideas you’re ready to create a space that feels luxurious spacious and welcoming regardless of its actual size.
Frequently Asked Questions
How can I make my small guest bathroom look bigger?
Use light, neutral colors like white, cream, or beige on walls to reflect more light and create visual expansion. Install bright LED vanity lighting and add natural light through skylights or larger windows. Wall-mounted vanities expose floor space underneath, creating the illusion of a larger room.
What are the best storage solutions for tiny bathrooms?
Maximize vertical space with floating shelves, especially triangular corner shelves above the toilet or beside mirrors. Install over-toilet storage cabinets and wall-mounted vanities to free up floor space. Use mirrors with built-in storage compartments and towel bars that double as shelving for multi-functional solutions.
Should I use bold colors or patterns in a small bathroom?
Yes, but strategically. Create one bold accent wall with patterned wallpaper featuring geometric designs or botanical prints. Use vertical stripes to make walls appear taller. Keep other walls neutral to maintain the spacious feel while adding personality through colorful artwork and decorative accessories.
What type of lighting works best in small guest bathrooms?
Install bright LED vanity lighting to eliminate shadows and provide even illumination. Position lights strategically to maximize reflection from mirrors and light-colored surfaces. Add natural light sources when possible, and use lighting above artwork to draw the eye upward and create height perception.
How do I choose the right mirror for a small bathroom?
Select large mirrors to create depth illusions and make the space feel bigger. Consider decorative mirrors as artistic focal points, but ensure they don’t overwhelm the room. Position mirrors to maximize light reflection and visual expansion. Mirrored medicine cabinets provide both function and storage.
Can I create a luxury feel in a small bathroom on a budget?
Absolutely. Choose quality hardware like brushed gold or matte black faucets as statement pieces. Install elegant tile backsplashes using glass or mosaic tiles. Add plush towels, spa-like accessories, and minimize fixture counts while maximizing their visual impact through strategic placement.
What layout tips help small bathrooms feel less cramped?
Position the toilet away from the entry door for better privacy and aesthetics. Maintain clear pathways between fixtures with adequate clearance space. Consider pocket doors to save swing space and create a more open environment while allowing for additional storage options.
How can I use vertical space effectively in a small bathroom?
Install floor-to-ceiling tile patterns, particularly vertical subway tiles, to create visual height. Use tall, narrow storage towers to maximize vertical real estate. Hang artwork higher than usual and add strategic lighting above it to draw the eye upward and emphasize spaciousness.